OFF GRID, HACKABLE MOBILE COMPUTER Version 2 OGHMC v2 ; )


OGHMC v2

This new build i built with the Radxa Zero with external WIFI antenna, comes with an extendable WIFI plug “U.FL (UMCC) to RP-SMA” that can be mounted outside ,

One of my biggest struggles with Debian was getting the external WIFI modules to work reliably and i found the rtl8188etv i was using particularly bad, while it does allow you to put the WIFI into monitor mode with Kali Linux it just sucks having to spend 2 -3 hours recompiling the kernel to get the drivers working, only to do an update and they stop again.

The external antenna helps with removing the need for the rtl8188etv module and solves any issues with range.

the keyboard is now replaced with a simpler blue tooth keyboard and track pad combination

it is WAY less stress and I already had one in my workshop, i still have the on screen key board with the touch screen and the “mouse” also working as part of the touch screen. until the blue tooth connects.

it does require a charge but the battery lasts ages.

i added heat sinks to the build . not so much cause it gets hot but cause i had them lying around an cooler is never bad.

I found a good charging board which ive upgraded, and connected to the batteries. it includes a buck and boost converter so you can control the voltage of variable inputs . means it can run on any 3v to 24v supplies as long as it has enough amps.

the screen is the same as before but I found the glue and bicarbonate of soda hack to work for only a few months, then it gave way, so i drilled the case and mounted it properly with screws. the case is still as water proof as it was, they are not perfectly water tight anyway.

i am looking at also upgrading the USB hub with Ethernet, its hardly ever used in most applications of the OGHMC but its good as backup

New Version Pics below

My New book is finally published


Get it here!!!

Bags, Bullets, Beans, Band-Aids, Bunkers and Boots, Book – Google Books

Attention all survival enthusiasts! Are you prepared for any situation life may throw your way? Introducing “Bags, Bullets, Beans, Band-Aids, Bunkers and Boots, Book,” the ultimate beginner’s guide to survival prepping.

With this comprehensive guidebook, you’ll learn how to establish a plan and different levels of preparedness to make sure you’re ready for anything. You’ll also discover how to create a Mutual Assistance Group, the importance of Bags and their different types, including the Everyday Carry Bag (EDC), the Get Home Bag (GHB), the Bug Out Bag (BOB), and the I’m Not Coming Home Bag (INCH Bag).

In addition, you’ll find a wealth of knowledge on Bullets and other Weapons, including hand weapons, knives, clubs, pistols, rifles, shotguns, antique weapons, and even artillery. You’ll learn how to create your own Bean stockpile, including tips on growing and preserving your own food, as well as raising and caring for animals like bunnies, chickens, goats, and pigs.

This guide also includes information on basic first aid and how to create a first aid kit, along with a First Aid guide, CPR, and treatment for burns, breaks, bullet wounds, and more. You’ll even learn how to create Bunkers and other Structures for defensive purposes, including fortifications, lighting, sandbags, and more.

Last but not least, this book provides a comprehensive list of clothing and gear, including cold and warm weather gear, car emergency gear, and overlanding gear.

Don’t be caught off guard during an emergency or crisis. Be ready with “Bags, Bullets, Beans, Band-Aids, Bunkers and Boots, Book,” the ultimate guide to survival prepping. Get your copy today and start preparing for whatever the future holds.

Mobile Surveillance – disposable cameras over drones


When it comes to surveillance and monitoring, there are many different tools available to choose from. One option that has gained popularity in recent years is the use of drones for monitoring and surveillance purposes. However, there are still many advantages to using fixed cameras over drones for certain applications.

Here are some of the advantages of using fixed cameras over drones:

Cost: Fixed cameras are generally less expensive than drones. While drones can be quite costly, especially when you factor in the cost of the drone itself as well as the cost of maintenance, training, and insurance, fixed cameras are typically more affordable and require less maintenance.

Consistency: Fixed cameras provide consistent coverage and can be set up to monitor a specific area continuously. This means that they can be used for long-term monitoring of an area without the need for constant human intervention. Drones, on the other hand, have a limited flight time and need to be recharged or replaced regularly.

Reliability: Fixed cameras are generally more reliable than drones. Drones can be affected by weather conditions such as high winds, rain, or snow, which can make it difficult or impossible to use them for monitoring purposes. Fixed cameras, on the other hand, are not affected by these weather conditions and can be used in a wider range of environments.

Privacy: Fixed cameras can be installed in areas where privacy is a concern, such as inside homes or buildings. Drones, on the other hand, can be seen as intrusive and may raise privacy concerns if they are flying over private property.

Ease of use: Fixed cameras are generally easier to use than drones. They can be set up and configured quickly and easily, and require minimal training to operate. Drones, on the other hand, require specialized training and certification to operate, which can make them more difficult to use.

Safety: Fixed cameras do not pose the same safety risks as drones. Drones can be dangerous if they crash or collide with objects, and can cause injury or damage to property. Fixed cameras, on the other hand, are stationary and do not move, which makes them safer to use.

Overall, while drones can be a useful tool for monitoring and surveillance purposes, there are still many advantages to using fixed cameras for certain applications. They are more cost-effective, consistent, reliable, private, easy to use, and safe than drones. When choosing a surveillance tool, it is important to consider the specific needs of your application and choose the tool that best meets those needs.

The ESP32-CAM is a low-cost, easy-to-use camera module with integrated Wi-Fi and Bluetooth capabilities. It is capable of capturing both still images and video, making it an ideal tool for home security applications. The Radxa Zero Cyberdeck, on the other hand, is a small, compact computer that can be used for a variety of applications, including security monitoring.

To begin, we’ll need to set up our ESP32-CAM modules. The first step is to install the necessary libraries and software. The ESP32-CAM requires a specific version of the Arduino IDE and a set of libraries that can be downloaded from GitHub. Once the libraries are installed, we can begin to program the ESP32-CAM.

We’ll start by configuring the Wi-Fi connection on the ESP32-CAM. We’ll need to connect the module to our local network so that it can communicate with the Radxa Zero Cyberdeck. Once the Wi-Fi connection is configured, we can start writing code to capture and transmit images and video.

The ESP32-CAM can capture both still images and video. We can use the built-in camera library to capture images and the ESP32-CAM’s video streaming library to transmit live video to the Radxa Zero Cyberdeck. We can also set up motion detection using the ESP32-CAM’s onboard motion sensor. This will allow us to receive notifications when motion is detected in a specific area.

Now that we have our ESP32-CAM modules set up, we can move on to the Radxa Zero Cyberdeck. The first step is to install the necessary software. We’ll need to install an operating system, such as Raspberry Pi OS, and then install the necessary libraries for the ESP32-CAM. Once the software is installed, we can begin to write code to receive and process the images and video streams from the ESP32-CAM.

We can use a variety of tools to process the images and video streams from the ESP32-CAM. For example, we can use OpenCV to detect faces or objects in the video stream. We can also use machine learning algorithms to analyze the video stream and detect anomalous behavior.

One potential application for the Radxa Zero Cyberdeck and ESP32-CAM modules is to set up a perimeter security system. We can install the ESP32-CAM modules around the perimeter of our homestead and use the Radxa Zero Cyberdeck to monitor the video streams. We can then set up motion detection to receive notifications when motion is detected in a specific area. This will allow us to quickly respond to potential threats and protect our homestead.

Another potential application is to set up a remote monitoring system. We can install the ESP32-CAM modules in various locations around our homestead and use the Radxa Zero Cyberdeck or other computer to monitor the video streams remotely. This will allow us to keep an eye on our homestead even when we’re away.

In conclusion, using ESP32-CAM modules and a Radxa Zero Cyberdeck can greatly enhance the security of your preppers homestead. With the ability to capture images and video, detect motion, and analyze video streams, we can set up a robust security system that will help protect us and our families in the event of a disaster or civil unrest. While the setup process may be a bit complex, the end result is well worth the effort.

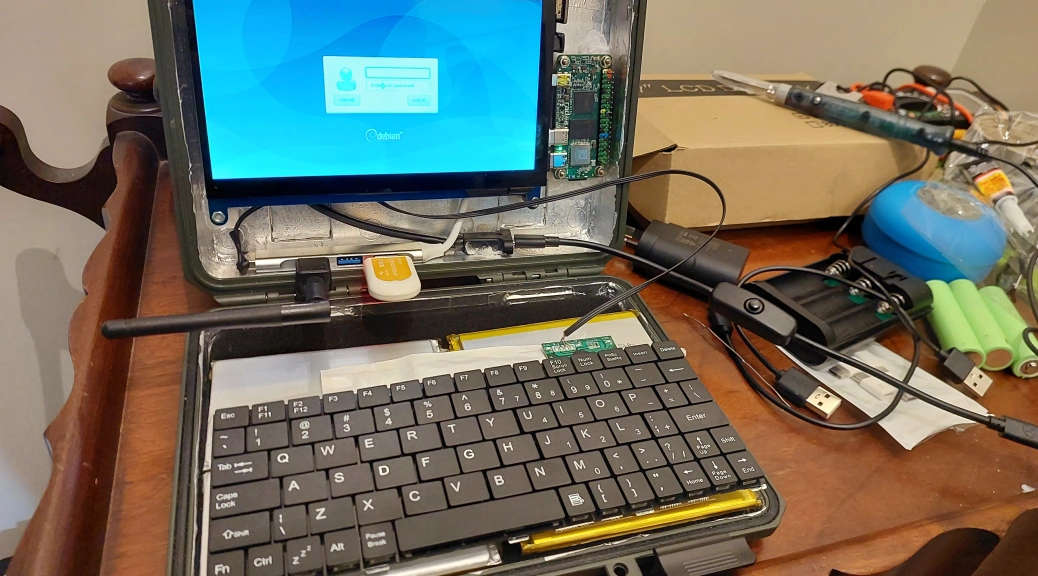
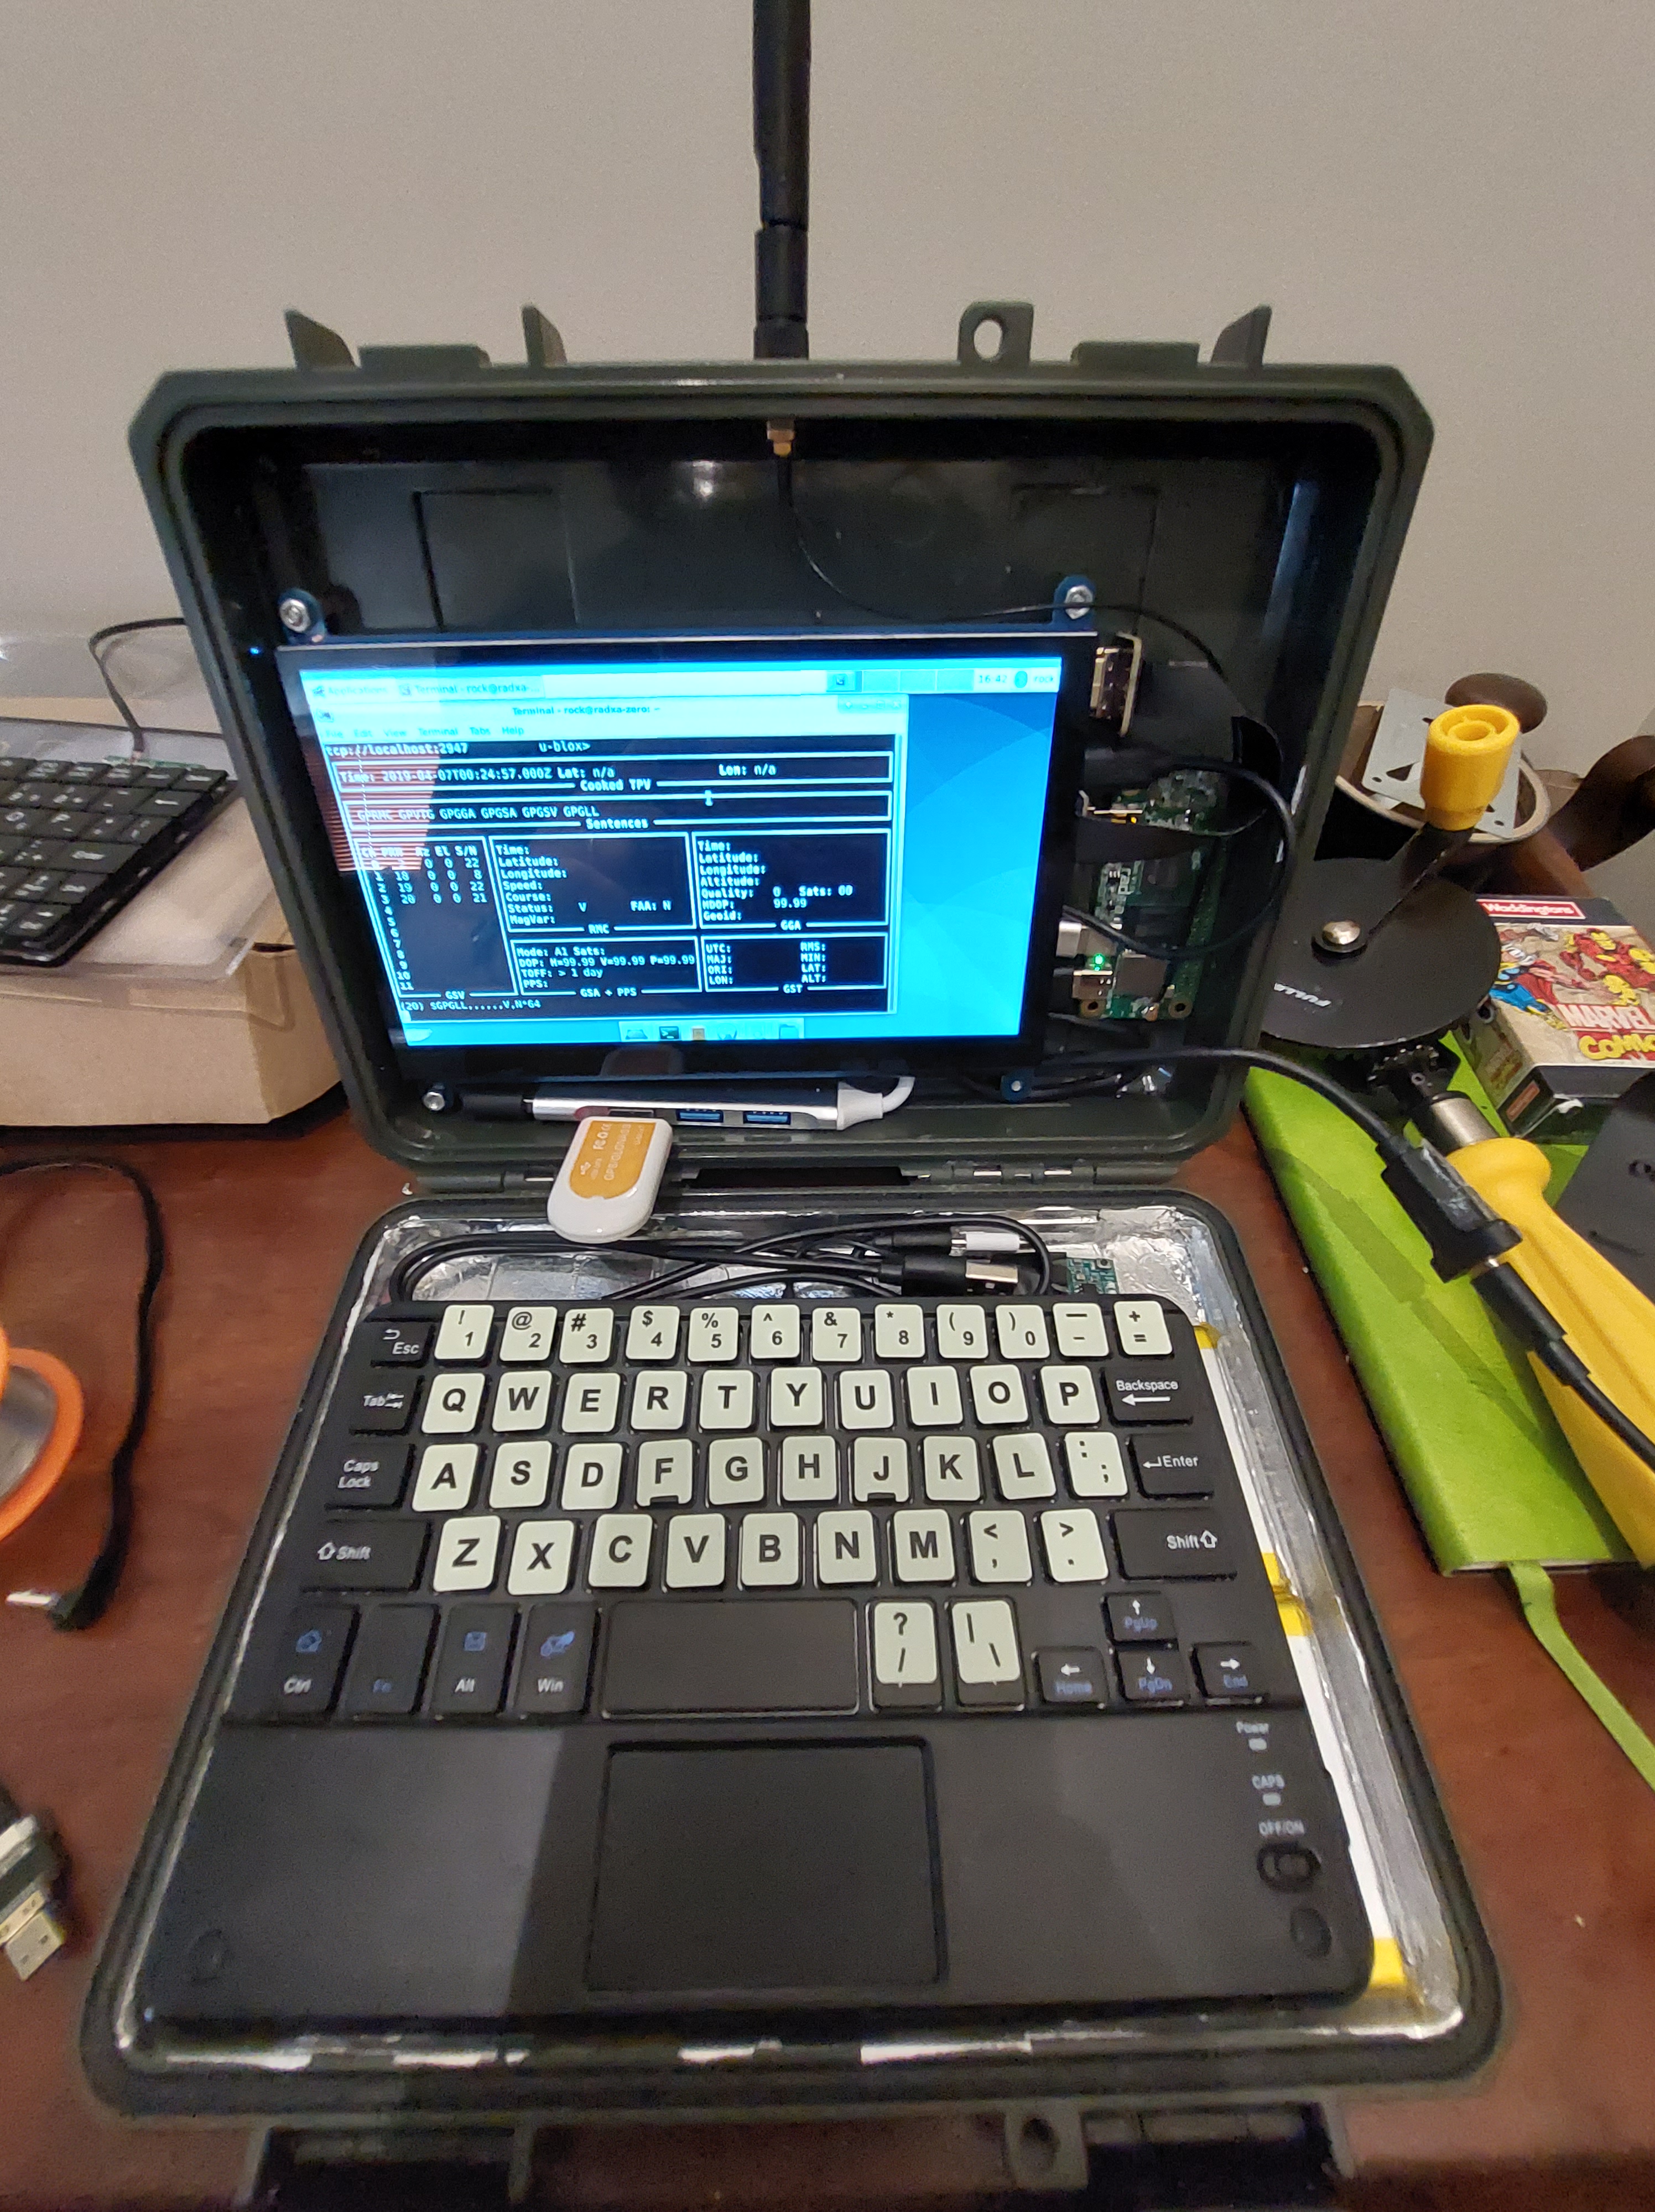
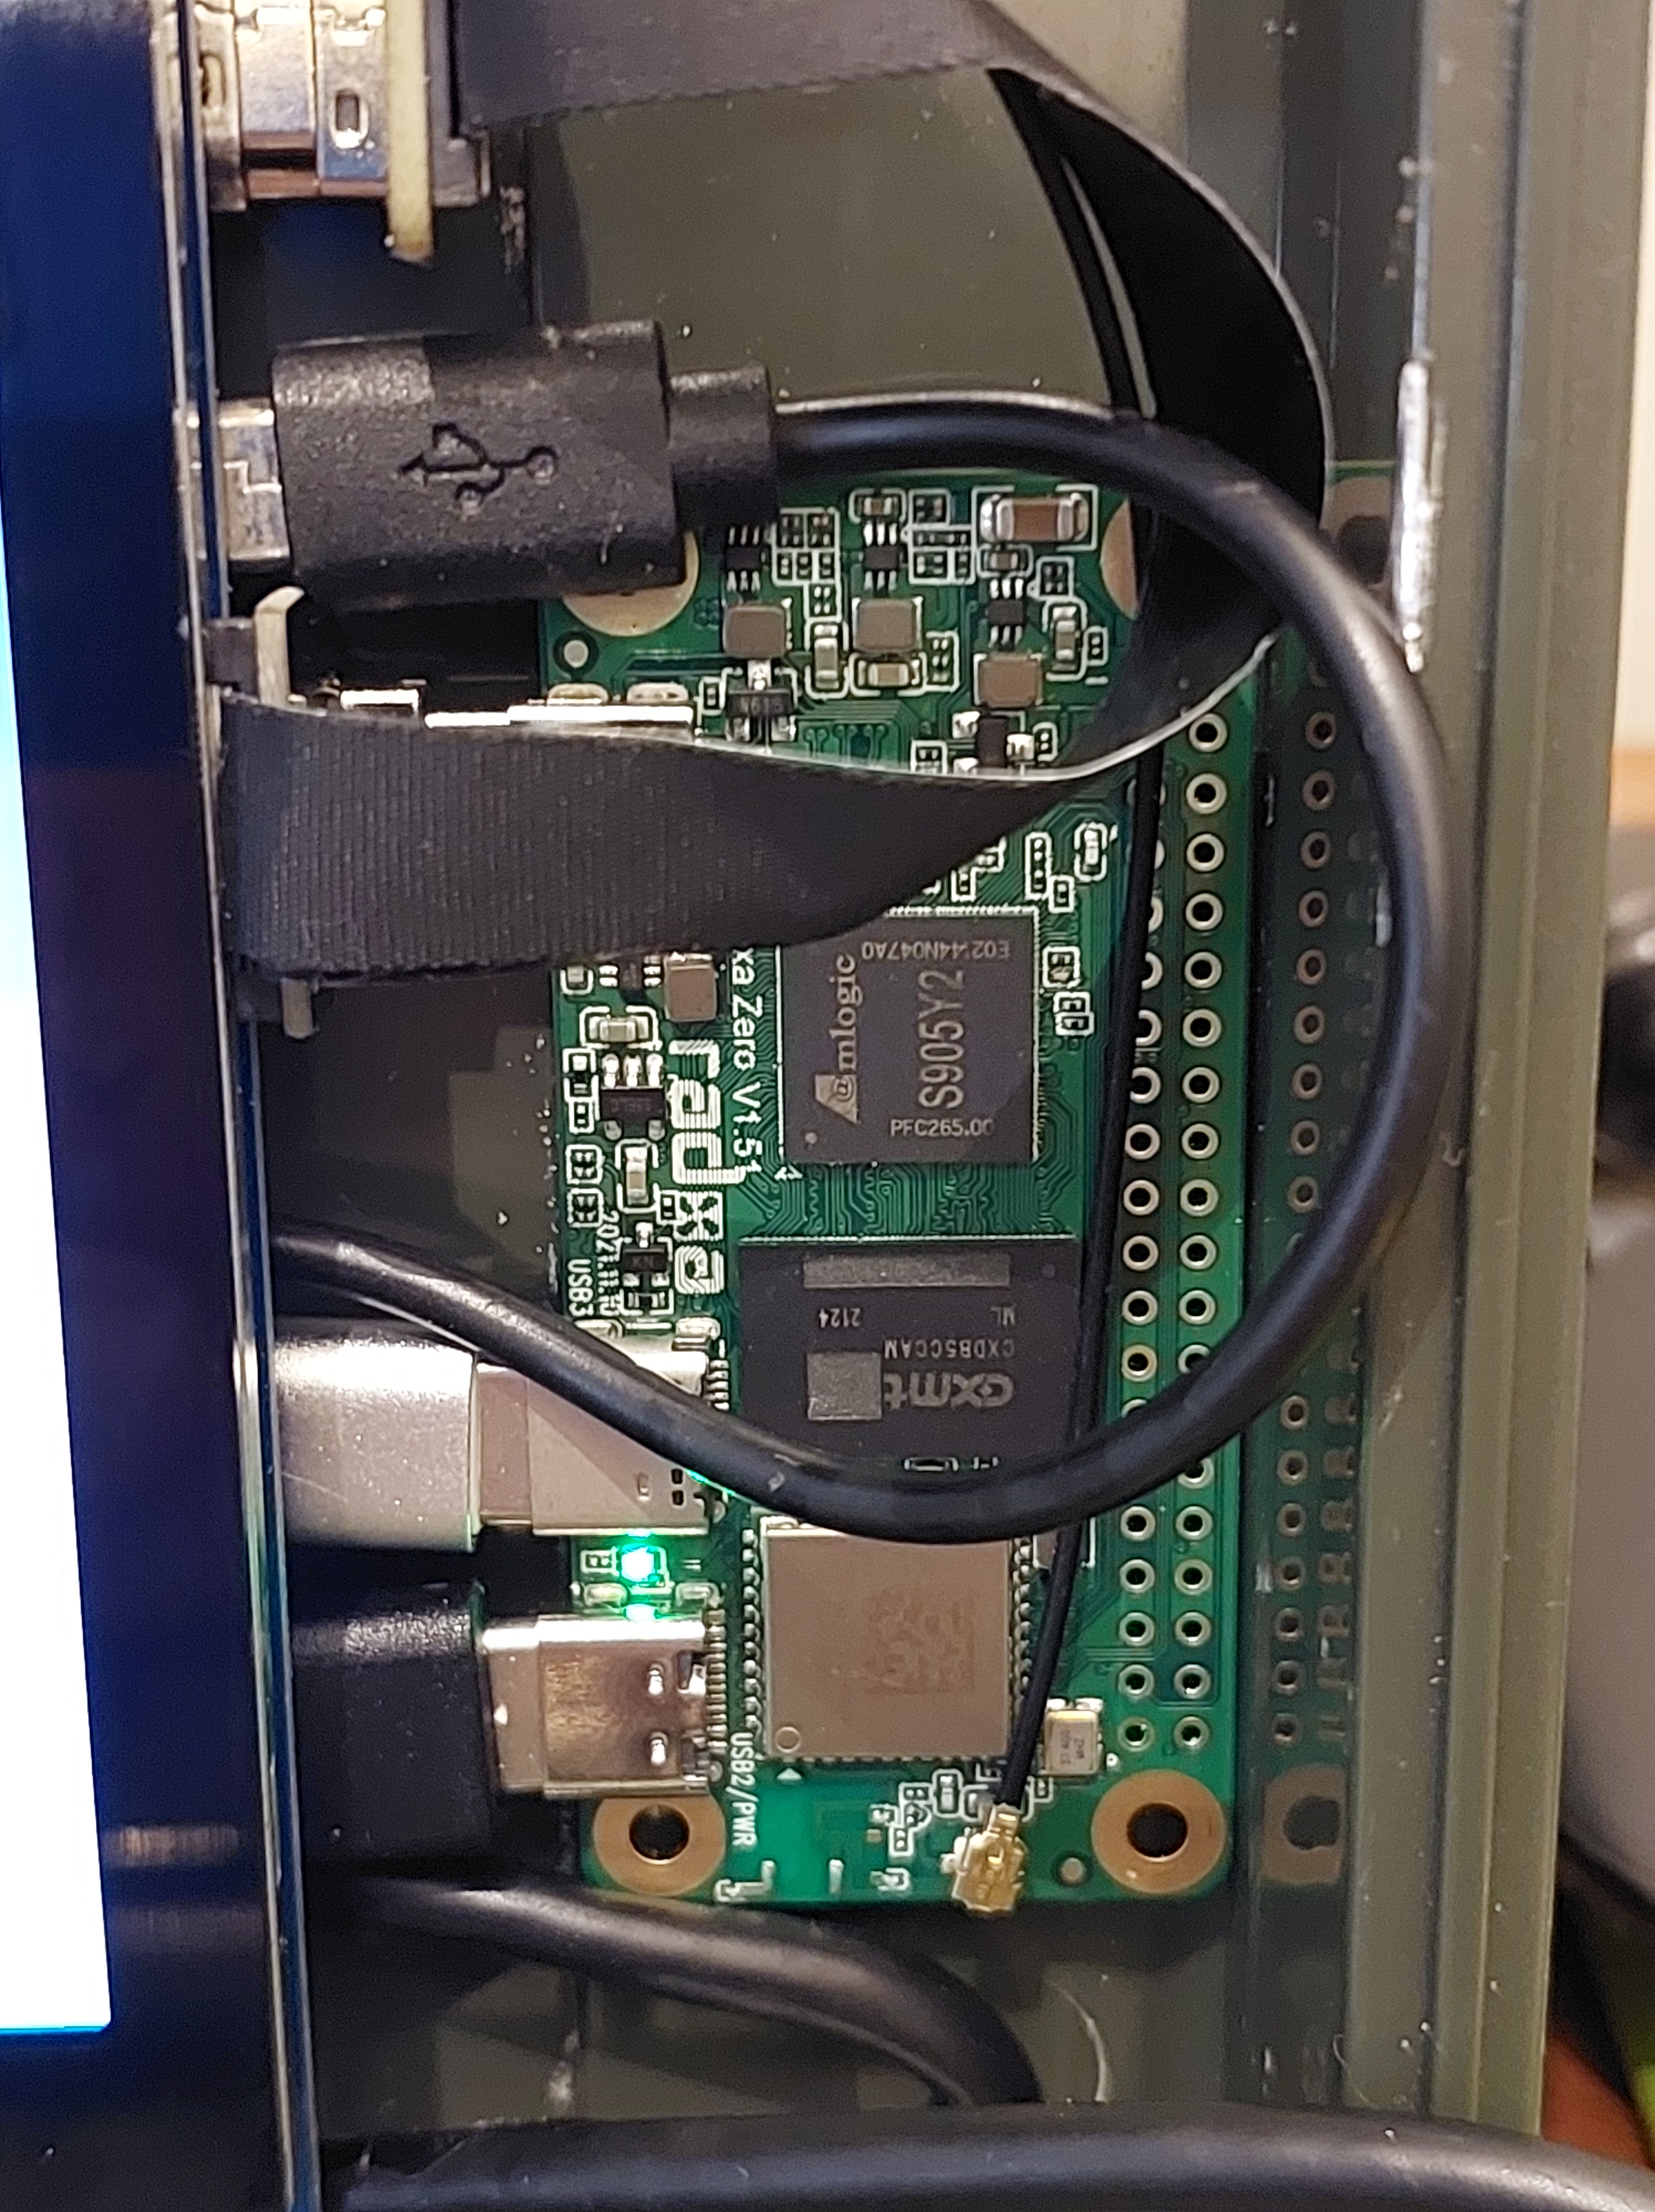
The Radxa Zero Cyberdeck is a small, compact computer that is designed for portable and embedded applications. It is based on the Raspberry Pi Zero platform and features a quad-core ARM Cortex-A53 CPU, 512MB of RAM, and a microSD card slot for storage. It also includes Wi-Fi and Bluetooth connectivity, making it ideal for IoT and home automation projects.

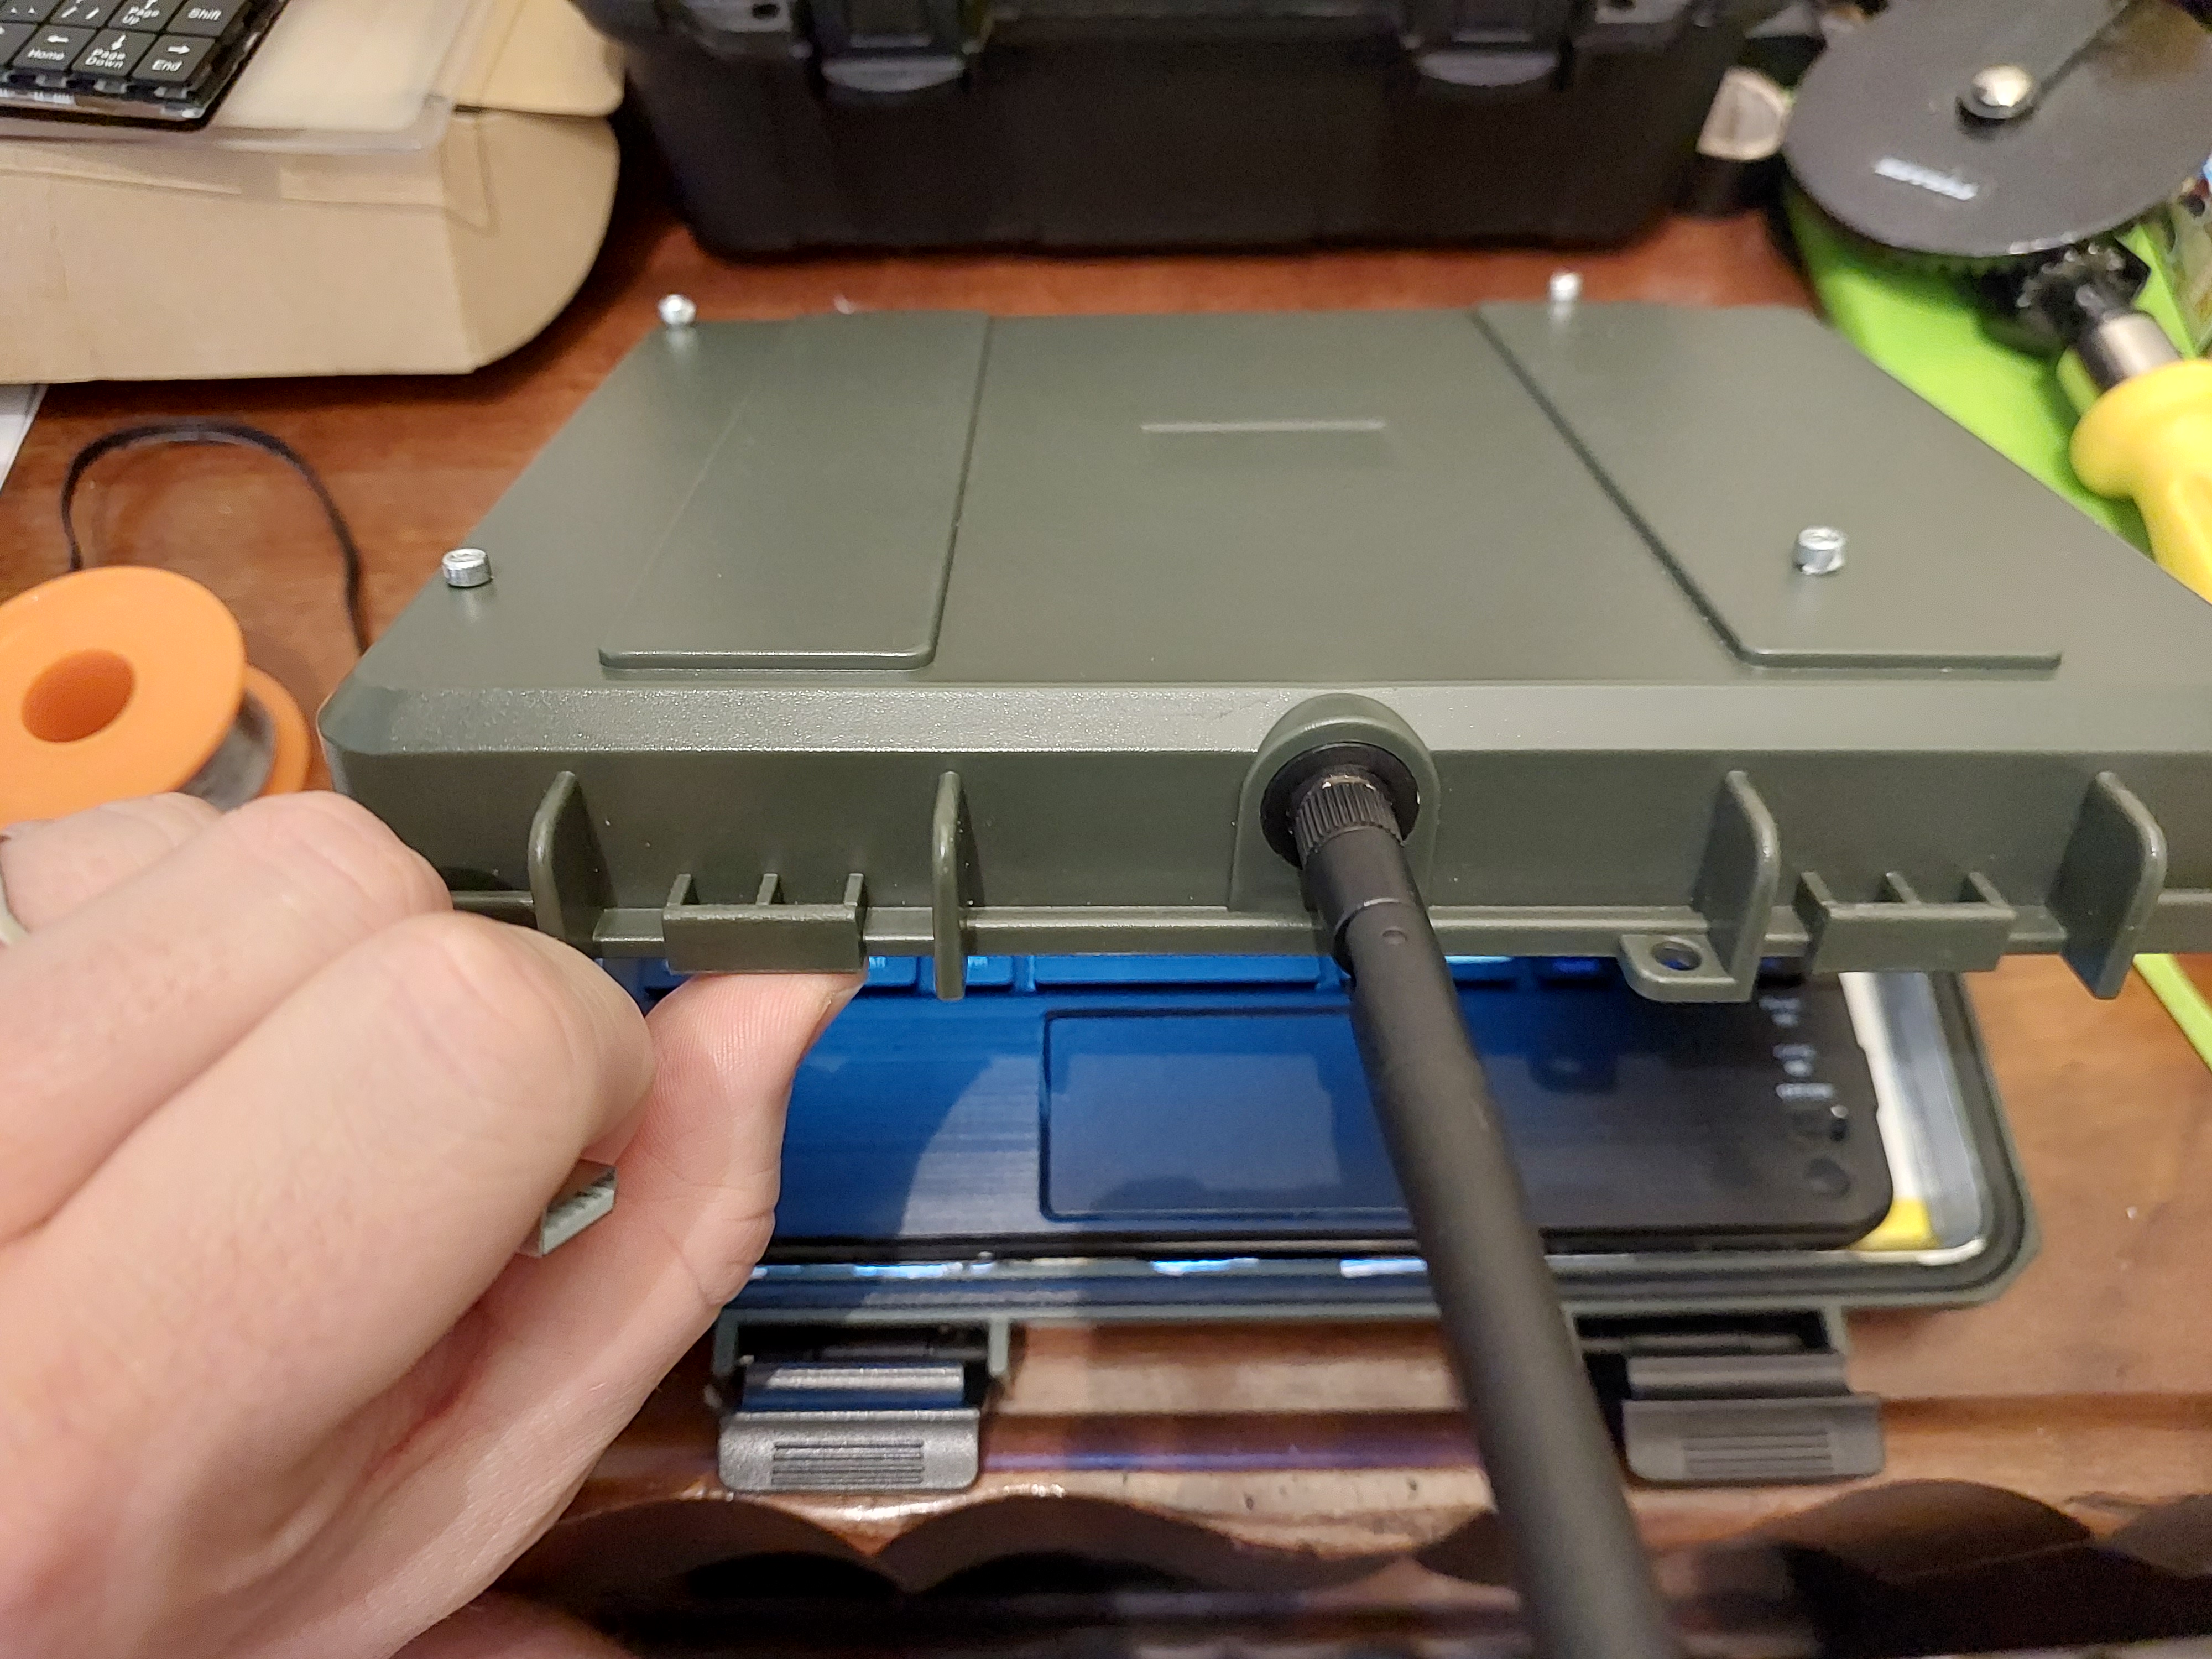
building a Radxa Zero Cyberdeck is a great choice for security monitoring applications, such as the one we discussed earlier. Its small size and low power consumption make it ideal for use in remote locations or for portable applications. It can be easily powered by a battery or solar panel, making it a great choice for off-grid applications.

In addition to security monitoring, the Radxa Zero Cyberdeck can be used for a variety of other applications. For example, it can be used as a media center or home automation hub. Its Wi-Fi and Bluetooth connectivity make it easy to connect to other devices, such as smart home devices or streaming media devices.

One of the unique features of the Radxa Zero Cyberdeck is its modular design. It includes a number of expansion ports that allow users to add additional functionality to the device. For example, it includes a 40-pin GPIO header that can be used to connect additional sensors or devices. It also includes a USB port, and a micro HDMI port.

The Radxa Zero Cyberdeck can be built to include a OLED touch display, which can be used to display information or status updates. It also can include a battery management system, which allows users to monitor the battery level and charge status of the device.

Overall, the Radxa Zero Cyberdeck is a versatile and powerful device that is well-suited for a variety of applications, including security monitoring. Its small size and low power consumption make it ideal for use in remote locations or for portable applications, and its modular design allows users to add additional functionality as needed. Whether you’re a prepper looking to secure your homestead or a hobbyist looking for a powerful and versatile device, the Radxa Zero Cyberdeck is definitely worth considering.

Best ways to preserve meat without refrigeration


Preserving meat without refrigeration can be challenging, but it is possible. Here are some of the best ways to preserve meat without refrigeration.

  1. Curing: Curing is a traditional method of preserving meat that involves rubbing salt and other seasonings onto the meat and allowing it to dry. This process removes moisture from the meat, making it less susceptible to spoilage. Sugar, nitrates, and nitrites may also be used in the curing process to preserve the meat and add flavor.
  2. Smoking: Smoking is another traditional method of preserving meat that involves hanging the meat in a smokehouse and exposing it to smoke from burning wood or other materials. The smoke helps to flavor the meat and preserve it by inhibiting the growth of bacteria.
  3. Drying: Drying is a method of preserving meat that involves hanging the meat in a dry, cool place and allowing it to air dry. The drying process removes moisture from the meat, making it less susceptible to spoilage. Jerky is a popular type of dried meat that is often made from beef, but can also be made from other types of meat.
  4. Salting: Salting is a method of preserving meat that involves rubbing salt onto the meat and allowing it to dry. The salt helps to inhibit the growth of bacteria and other microorganisms that can cause the meat to spoil.
  5. Fermenting: Fermenting is a method of preserving meat that involves allowing the meat to sit in a brine solution for several days. The brine solution contains salt, water, and other seasonings, as well as lactic acid bacteria, which help to preserve the meat by producing lactic acid, which inhibits the growth of harmful bacteria.
  6. Caning: Canning is a modern method of preserving meat that involves cooking the meat and then sealing it in a jar or can. The heat from the cooking process kills any bacteria in the meat, and the sealed jar prevents new bacteria from getting in, allowing the meat to be stored for long periods without refrigeration.

In conclusion, preserving meat without refrigeration can be challenging, but there are several traditional and modern methods that can be used. By using one or more of these methods, you can enjoy meat that is safe to eat and delicious, even when refrigeration is not available

Making a solar oven


A solar oven is a device that harnesses the power of the sun to cook food. It is an eco-friendly and cost-effective way to prepare food, especially in areas where there is no access to electricity or gas. Making a DIY solar oven is a simple project that can be completed in just a few hours. Here’s how to make a DIY solar oven.

Materials Required:

  • A cardboard box
  • Aluminum foil
  • Black paint or marker
  • Glue
  • Clear plastic sheet
  • Styrofoam sheet
  • Scissors
  • Ruler
  • Pencil

Step 1: Choose the Right Box The first step in making a solar oven is to choose the right box. The box should be large enough to hold a cooking pot or dish. It should also be sturdy enough to withstand the heat of the sun. A pizza box is an excellent choice for a small solar oven, while a larger box such as a shipping box is ideal for a larger oven.

Step 2: Prepare the Box Using a ruler and pencil, draw a square on the top of the box, leaving at least an inch of space on all sides. Cut along the lines with scissors to create a square opening. This will be the lid of the solar oven.

Step 3: Insulate the Box To insulate the box, line the inside with a sheet of Styrofoam. This will help to keep the heat inside the oven. Use glue to attach the Styrofoam to the inside of the box.

Step 4: Line the Box with Foil Using aluminum foil, line the bottom and sides of the box. The shiny side should face inward to reflect the heat. Use glue to attach the foil to the box.

Step 5: Paint or Marker the Inner Lid To absorb heat, paint or color the inside of the lid with black paint or marker. This will help to absorb the heat and transfer it to the food. Allow the paint to dry completely.

Step 6: Add Clear Plastic Sheet Cut a sheet of clear plastic slightly larger than the lid opening. Use glue to attach it to the underside of the lid, so it covers the opening. This will allow sunlight to enter the oven.

Step 7: Test the Oven To test the oven, place a pot of food inside and place the lid on top. Place the oven in direct sunlight, making sure the plastic sheet faces the sun. Check the food after an hour or so, and if it’s not cooked, leave it in for a little longer.

In conclusion, making a DIY solar oven is an easy and cost-effective way to cook food. By following these steps, you can make a solar oven that is perfect for camping, picnics, or even cooking at home. A solar oven can help you save money and reduce your carbon footprint, all while enjoying a delicious meal prepared with the power of the sun.

here are a few tips to keep in mind to ensure you get the best results. Here’s how to use a solar oven.

  1. Choose the Right Day Solar ovens work best on clear, sunny days. Choose a day with plenty of sunshine and minimal cloud cover.
  2. Position the Oven Place the solar oven in a location that gets full sun exposure. Make sure it is positioned so that the reflectors and lid are facing the sun.
  3. Preheat the Oven It’s important to preheat your solar oven before adding food. This helps to ensure that the oven is at the right temperature to cook the food. Preheat the oven for 15-20 minutes before adding food.
  4. Prepare the Food Food should be prepared and placed in a dark, shallow pot or dish. Dark colors absorb more heat and transfer it to the food. Cover the pot with a lid or foil to help retain heat.
  5. Place the Food in the Oven Carefully place the pot or dish in the center of the solar oven. Make sure it is balanced and won’t tip over.
  6. Monitor the Temperature Solar ovens can reach temperatures of up to 350 degrees Fahrenheit. It’s important to monitor the temperature of the oven to ensure that it is cooking the food properly. A cooking thermometer can be used to check the temperature of the food.
  7. Adjust the Oven If the temperature of the oven is too low, adjust the position of the oven to get more direct sunlight. If the temperature is too high, adjust the position of the oven or open the lid slightly to release some of the heat.
  8. Cook the Food Cooking times will vary depending on the type of food and the temperature of the oven. It may take longer to cook food in a solar oven than in a conventional oven, so be patient and allow extra time.
  9. Remove the Food Carefully remove the pot or dish from the oven using oven mitts or pot holders. Be careful not to spill the hot food.

In conclusion, using a solar oven is a simple process that requires a bit of patience and attention to detail. By following these steps, you can enjoy a delicious meal prepared with the power of the sun. Solar ovens are a great way to save money, reduce your carbon footprint, and enjoy the benefits of cooking with renewable energy

How to dig a DIY water well


Digging a water well is a great way to secure a water supply on your property. With the help of some simple tools and the right knowledge, you can easily create a DIY water well that will provide you with clean, fresh water for years to come. Here’s how to do it.

Step 1: Choose the Location

The first step in digging a DIY water well is to choose the right location. You need to find a spot that is near a natural water source, such as a stream or a spring. This will make it easier to dig and will increase the chances of finding water.

You also need to make sure that the spot is not too close to any septic systems or other sources of contamination. You can use a soil test kit to check for any signs of contamination.

Step 2: Gather the Tools

The next step is to gather the tools you will need to dig the well. You will need a pickaxe, a shovel, a bucket, a well screen, a well cap, a well pump, and some PVC piping.

You can purchase all of these items at your local hardware store or online. You can also rent a drilling rig if you prefer, but it can be expensive.

Step 3: Start Digging

Now it’s time to start digging. You will need to dig a hole that is about 10 to 15 feet deep and 2 feet wide. Make sure that the sides of the hole are straight and not sloped.

Use the pickaxe to break up any rocks or hard soil that you encounter. Use the shovel to remove the dirt and debris from the hole.

Step 4: Install the Well Screen

Once you have dug the hole, it’s time to install the well screen. The well screen is a cylinder-shaped piece of metal or PVC that has small holes in it. It helps to filter out any debris or sediment that could clog the well pump.

Insert the well screen into the hole and make sure that it is secure. You can use rocks or cement to hold it in place.

Step 5: Install the PVC Piping

Next, you need to install the PVC piping. This will be used to bring the water up from the well to the surface.

Attach the PVC piping to the well screen and lower it down into the well. Make sure that it is securely attached and that it extends above the surface of the ground.

Step 6: Install the Well Cap

Once the PVC piping is in place, it’s time to install the well cap. The well cap is a cover that protects the well from debris and animals.

Attach the well cap to the top of the PVC piping and make sure that it is securely fastened.

Step 7: Install the Well Pump

The final step is to install the well pump. The well pump is what will be used to bring the water up from the well and into your home.

Attach the well pump to the top of the PVC piping and make sure that it is securely fastened. Connect the well pump to your home’s water system and turn it on to test it.

Conclusion

Digging a DIY water well can be a challenging but rewarding experience. With the right tools and knowledge, you can create a reliable water source that will provide you with clean, fresh water for years to come. Just remember to take your time and follow these steps carefully to ensure that your well is installed correctly and safely.

Tips for starting a prepper garden


A prepper garden is an excellent way to provide a source of food during an emergency or crisis. Growing your own food not only saves money but also ensures that you have fresh produce available at all times. While most people tend to focus on growing fruits and vegetables, it’s also essential to consider growing other crops like potatoes, sorghum, corn, wheat, and other alternatives. In this article, we’ll discuss some tips for starting a prepper garden and what crops to consider planting.

1.Soil Preparation

Before planting anything in your garden, you need to prepare the soil. This involves removing any weeds or debris and tilling the soil to a depth of at least six inches. You can also add organic matter like compost or manure to the soil to improve its quality. If you’re planting potatoes, ensure the soil is loose and well-drained.

2.Choosing the Right Crops

When it comes to prepper gardening, it’s essential to choose the right crops that can thrive in your climate and provide maximum nutrition. Potatoes, for example, are a versatile crop that can be grown in most regions and provide a good source of carbohydrates. Sorghum is also a good option for prepper gardens, as it’s drought-tolerant and can be used to make flour, syrup, or even animal feed.

Corn is another popular crop for prepper gardens, as it’s rich in carbohydrates, protein, and fiber. It’s also easy to grow and can be used for a variety of purposes like making flour, cornmeal, and animal feed. Wheat is another staple crop that’s easy to grow and provides a good source of protein, fiber, and carbohydrates. It’s also versatile and can be used to make flour or bread.

Other crops to consider planting in your prepper garden include beans, peas, tomatoes, cucumbers, squash, and peppers. These vegetables are easy to grow and provide a good source of vitamins, minerals, and fiber.

3.Starting Seeds

Starting seeds is an excellent way to ensure that you have a steady supply of fresh produce throughout the growing season. You can start seeds indoors in late winter or early spring and transplant them into your garden once the weather warms up. Be sure to follow the instructions on the seed packet for proper planting depth and spacing.

4.Proper Watering

Proper watering is essential for the health and growth of your plants. You should water your plants deeply once or twice a week, depending on the weather and soil conditions. Be sure to water early in the day to reduce the risk of fungal diseases. If you’re growing potatoes, they require consistent moisture to ensure proper tuber development.

5.Pest Control

Pests like aphids, caterpillars, and beetles can quickly destroy your prepper garden if left unchecked. One way to control pests is to plant companion crops like marigolds or garlic, which repel pests naturally. You can also use organic pest control methods like neem oil or insecticidal soap.

6.Harvesting

When it comes to harvesting your prepper garden, timing is everything. You should harvest your crops when they’re ripe and ready to eat. Potatoes should be harvested once the foliage dies back, while sorghum can be harvested once the seed heads turn brown. Corn should be harvested once the ears are plump and the silks have turned brown.

It’s important to harvest your crops in a timely manner, as leaving them in the ground or on the plant for too long can cause them to become overripe, and their quality may deteriorate. Additionally, leaving crops in the ground for too long can make them more susceptible to pests and diseases.

When harvesting your crops, make sure you have the necessary tools and containers on hand. Some crops, like tomatoes and peppers, are delicate and should be picked by hand. Others, like potatoes and carrots, can be dug up with a garden fork.

7. Storage

Once you’ve harvested your crops, it’s important to store them properly. Some crops, like potatoes, should be stored in a cool, dark place to prevent them from sprouting. Others, like onions and garlic, should be stored in a dry, well-ventilated area.

Finally, don’t forget to save some of your harvest for seed. Select the healthiest and best-performing plants to save seed from, and make sure to properly dry and store the seeds for use in next year’s garden.

The best ways to store and preserve grains for future use


Grains have been a staple food for humans for thousands of years, providing a reliable source of carbohydrates, protein, and other essential nutrients. Storing and preserving grains for future use is an important part of prepping, as it allows you to have a long-term supply of food in case of emergencies. In this article, we will discuss the best ways to store and preserve grains, including sorghum, corn, wheat, and other alternatives.

  1. Dry Storage

One of the most common and simple ways to store grains is in dry storage. This method involves storing grains in a cool, dry place with good ventilation. The ideal temperature for dry storage is between 50 and 70 degrees Fahrenheit, with humidity levels below 15 percent. Grains should be stored in airtight containers, such as glass jars or food-grade plastic buckets with tight-fitting lids.

  1. Vacuum Sealing

Vacuum sealing is another effective method of grain storage, which involves removing all the air from the storage container to prevent spoilage. This method is particularly useful for long-term storage of grains, as it can extend the shelf life of grains for several years. Vacuum-sealed containers can be stored in a cool, dry place, such as a basement or pantry.

  1. Freezing

Freezing is an effective method of preserving grains, particularly those that are prone to insect infestations, such as corn and wheat. Grains can be frozen in airtight containers or vacuum-sealed bags, and stored in the freezer for up to two years. To prevent moisture from forming on the grains during thawing, it is important to allow the grains to come to room temperature before opening the container.

  1. Dehydrating

Dehydrating is another effective method of preserving grains, which involves removing the moisture from the grains to prevent spoilage. This method is particularly useful for sorghum, which can be difficult to store due to its high moisture content. To dehydrate grains, spread them out in a single layer on a dehydrator tray, and dry them at a low temperature for several hours. Once dry, the grains can be stored in airtight containers.

  1. Mylar Bags

Mylar bags are a popular storage option for grains, as they are airtight and moisture-resistant. These bags can be purchased in various sizes, and can be used to store grains for long periods of time. To use Mylar bags, place the grains inside the bag, and seal the bag using a heat sealer. The bags can be stored in a cool, dry place, such as a basement or pantry.

  1. Oxygen Absorbers

Oxygen absorbers are small packets that are used to remove the oxygen from the storage container, which can help to prevent spoilage and extend the shelf life of grains. These packets can be placed inside airtight containers or Mylar bags, and can be purchased online or at specialty food stores.

  1. Silos

Silos are large storage containers that are used to store grains in bulk. These containers are often used by farmers and ranchers to store grains for animal feed, but can also be used for long-term storage of grains for human consumption. Silos should be stored in a cool, dry place, and should be inspected regularly for signs of moisture or insect infestation.

In conclusion, there are several effective methods for storing and preserving grains for future use, including dry storage, vacuum sealing, freezing, dehydrating, Mylar bags, oxygen absorbers, and silos. When storing grains, it is important to keep them in a cool, dry place, with good ventilation and low humidity levels. By following these tips, you can ensure that you have a reliable source of food for yourself and your family in case of emergencies.

When it comes to choosing which grains to store, it is important to consider their nutritional value and how versatile they are in cooking. Some of the most popular grains for long-term storage include sorghum, corn, wheat, rice, and barley. Sorghum is a great alternative to wheat for those with gluten intolerance, and it is also high in protein, fiber, and antioxidants. Corn is another versatile grain that can be used for making bread, tortillas, and other baked goods, and it is also a good source of carbohydrates and fiber.

Wheat is perhaps the most commonly stored grain, and for good reason. It is a great source of carbohydrates, protein, and fiber, and can be used for making a wide variety of foods, including bread, pasta, and cereal. When storing wheat, it is important to choose the right type of wheat, as some varieties are better suited for long-term storage than others. Hard red wheat, for example, is one of the most popular varieties for long-term storage, as it has a high protein content and is less prone to spoilage than other types of wheat.

In addition to these grains, there are several other alternatives that are worth considering for long-term storage. These include oats, quinoa, millet, and amaranth, all of which are high in nutrients and can be used in a variety of recipes. Oats, for example, are a great source of fiber and protein, and can be used for making oatmeal, granola, and baked goods. Quinoa is another highly nutritious grain, which is high in protein, fiber, and minerals such as iron and magnesium.

In summary, storing and preserving grains is an important part of prepping for emergencies. There are several effective methods for storing grains, including dry storage, vacuum sealing, freezing, dehydrating, Mylar bags, oxygen absorbers, and silos. When choosing which grains to store, it is important to consider their nutritional value and versatility in cooking. By following these tips, you can ensure that you have a reliable source of food for yourself and your family in case of emergencies.

Things you can do to make your homestead more secure from bandits when there is no electricity


Homesteading can be a fulfilling and self-sufficient lifestyle, but it also requires a certain level of security. When living off the grid, it’s important to be prepared for potential threats, including bandits or intruders. In this three-part article series, we will explore some practical steps you can take to make your homestead more secure from bandits when there is no electricity. Let us discuss the importance of developing a security plan.

Part 1: Develop a Security Plan

Developing a security plan is essential for ensuring the safety of your family and your homestead. Here are some steps you can take to create a security plan that works for your homestead:

  1. Assess Potential Threats: The first step in creating a security plan is to assess potential threats. This could include wildlife, natural disasters, and human threats such as bandits or intruders. Consider the likelihood of each threat and the potential impact it could have on your homestead.
  2. Identify Vulnerabilities: Once you have assessed potential threats, identify any vulnerabilities on your homestead that could make it easier for bandits to gain access. This could include weak points in your perimeter fence, unsecured windows or doors, or valuable items that are easily visible.
  3. Develop Security Measures: Based on your assessment of potential threats and vulnerabilities, develop a plan to increase security on your homestead. This could include installing a perimeter fence, reinforcing doors and windows, installing security cameras or motion sensors, and developing a plan for responding to emergencies.
  4. Implement the Plan: Once you have developed a security plan, it’s important to implement it. This could involve making physical improvements to your homestead, such as installing security measures or reinforcing doors and windows. It could also involve developing procedures for responding to emergencies, such as creating a safe room or establishing a communication plan.
  5. Train Your Family: Finally, it’s important to train your family on the security plan and make sure they understand their roles in keeping the homestead secure. This could involve practicing emergency drills, discussing safety procedures, and establishing a system for communication and alerting authorities if necessary.

By developing a security plan and implementing it, you can help to ensure the safety of your family and your homestead..

Here are some practical steps you can take to improve the physical security of your homestead.

  1. Install Perimeter Fencing: Installing perimeter fencing is a crucial step in securing your homestead from bandits. The fence should be at least six feet high and made of sturdy materials such as wood or metal. You can also install motion sensors or alarms along the perimeter fence to alert you to any intruders.
  2. Reinforce Doors and Windows: Reinforcing doors and windows is another important step in improving the physical security of your homestead. Install deadbolts on all exterior doors and use reinforced glass on windows. You can also install security bars or grills on windows to prevent intruders from gaining access.
  3. Install Security Cameras: Installing security cameras can help you monitor your homestead and deter potential intruders. Place cameras at strategic locations such as the perimeter fence, entrances, and around valuable items. Make sure to choose cameras with night vision capabilities and a backup power source in case of electricity outages.
  4. Use Landscaping to Your Advantage: Landscaping can also play a role in improving the physical security of your homestead. Plant thorny bushes or cacti around the perimeter fence to make it more difficult for intruders to gain access. You can also use landscaping to create natural barriers that make it more difficult for intruders to approach your homestead.
  5. Store Valuable Items Securely: Finally, make sure to store valuable items such as firearms, tools, and equipment securely. Use locked storage cabinets or safes to prevent unauthorized access. You can also use decoy storage containers to mislead intruders into thinking they have found valuable items.

By taking these steps to improve the physical security of your homestead, you can make it more difficult for bandits to gain access and increase the safety of your family and property. In part three of this series, we will discuss some additional measures you can take to improve your homestead’s security without relying on electricity.

  1. Establish a Neighborhood Watch: Establishing a neighborhood watch can be a powerful way to increase security on your homestead. Work with your neighbors to establish a system for monitoring and reporting suspicious activity. You can also work together to patrol the area and keep an eye out for any potential threats.
  2. Use Guard Dogs: Guard dogs can be an effective way to deter intruders and provide an early warning system. Choose breeds that are known for their protective instincts, such as German Shepherds or Rottweilers. Train the dogs to respond to potential threats and to alert you if they detect any intruders.
  3. Create a Safe Room: Creating a safe room can provide a secure location for you and your family in case of an emergency. Choose a room with no windows and reinforce the walls, door, and ceiling with sturdy materials. Stock the room with emergency supplies such as food, water, and first aid supplies.
  4. Use Non-Electric Alarms: Non-electric alarms such as air horns or whistles can provide an effective way to alert you to potential threats. Keep these alarms in strategic locations such as near entrances or in your safe room. Make sure to practice using the alarms with your family so that everyone knows how to use them.
  5. Develop an Emergency Plan: Finally, it’s important to develop an emergency plan in case of a security threat. This should include procedures for contacting authorities, evacuating the area, and communicating with family members. Make sure everyone in your family knows the plan and practices it regularly.

By taking these additional security measures that do not rely on electricity, you can increase the safety and security of your homestead. Remember that security is an ongoing process, and it’s important to stay vigilant and adapt to changing circumstances. By developing a security plan, improving physical security, and taking additional security measures, you can help ensure the safety of your family and your homestead.

How to Trap and Hunt for Food in the Wilderness


When venturing into the wilderness, having the knowledge and skills to hunt and trap for food can mean the difference between surviving and struggling. Learning how to trap and hunt for food in the wilderness is an essential skill for any prepper, survivalist, or outdoor enthusiast. In this article, we will explore different types of traps and hunting methods that can be used in the wilderness to acquire food.

Trapping

Trapping is a common and effective method of acquiring food in the wilderness. There are many different types of traps, but they all work on the same principle: to catch animals by luring them into a trap where they become stuck or caught. Here are some common types of traps:

  1. Deadfall trap: This is a simple trap that uses a heavy rock or log to kill the animal. A trigger stick is placed under the rock or log, which is held up by a prop stick. When the animal disturbs the trigger stick, the prop stick is dislodged, causing the rock or log to fall on the animal.
  2. Snare trap: This is a trap that uses a wire or cord to catch an animal. The snare is set up in a location where the animal is likely to pass by, such as a game trail. The wire or cord is looped around the animal’s neck or leg, and as the animal moves, the snare tightens, holding the animal in place.
  3. Conibear trap: This trap is a type of body-gripping trap that uses a powerful spring to kill the animal quickly. The animal is lured into the trap by bait, and when it touches the trigger, the trap springs shut, killing the animal instantly.
  4. Box trap: This is a humane trap that uses a box or cage to capture the animal alive. The animal is lured into the trap by bait, and once inside, the door is triggered shut, trapping the animal inside.

Hunting

Hunting is another effective way to acquire food in the wilderness. However, hunting requires more skill and experience than trapping. Here are some common hunting methods:

  1. Bow hunting: This is a traditional hunting method that uses a bow and arrow to kill the animal. Bow hunting requires a lot of practice and skill to master, as the hunter needs to be able to accurately shoot the arrow at the animal.
  2. Rifle hunting: This is a more modern hunting method that uses a rifle to kill the animal. Rifle hunting requires less skill than bow hunting, but it still requires practice and knowledge of the animal’s behavior.
  3. Spear hunting: This is a primitive hunting method that uses a spear to kill the animal. Spear hunting requires a lot of skill and experience, as the hunter needs to be able to get close enough to the animal to make a successful kill.
  4. Trapping and snaring: As mentioned earlier, trapping and snaring can also be considered a type of hunting, as the hunter is still actively pursuing the animal. Trapping and snaring can be a more passive hunting method, as the traps are set up and the hunter waits for the animal to become caught.

Safety Considerations

When hunting and trapping for food in the wilderness, safety should always be a top priority. Here are some safety considerations to keep in mind:

  1. Always follow local hunting and trapping regulations and laws.
  2. Be sure to properly identify the animal before shooting or trapping it. Mistakenly killing or trapping the wrong animal can have serious consequences.
  3. Wear appropriate safety gear, such as a hunting vest, gloves, and eye and ear protection.
  4. Know your limits and don’t take risks. Hunting and trapping in the wilderness can be dangerous, so it’s important to know your limitations and not take unnecessary risks.

Conclusion

In conclusion, knowing how to trap and hunt for food in the wilderness is an essential skill for anyone who spends time in the great outdoors. Trapping and hunting provide a reliable source of food in emergency situations, but it requires knowledge, experience, and skill. It’s important to remember that safety should always be a top priority when hunting and trapping, so make sure to follow local regulations and laws, properly identify the animals, and wear appropriate safety gear. With practice and patience, anyone can learn how to successfully trap and hunt for food in the wilderness.

meshtastic – off grid long range coms


check out https://www.meshtastic.org/

buy these direct , and already loaded off ebay – or roll your own with and ESP32 off the shelf .

https://www.ebay.com/sch/i.html?_from=R40&_trksid=p2334524.m570.l1313&_nkw=meshtastic&_sacat=0&LH_TitleDesc=0&_osacat=0&_odkw=meshatastic

communication without mobile coverage

the basic idea is you connect via bluetooth from an android phone app to the device and it communicates with the mesh network on a free band to other devices on the same channel – still a work in progress but looks amazingly promising for coms up to a few miles.

when using the gps modules they also give your location to other nodes allowing basic direction finding . great idea for remote hunting spots where cell phone coverage is bad.

Unusual gear from a South African Recce


When i was in the army, I got a chance to train with the Recce troops.one of the more unusual items they carried was a small glow-in-the-dark tablet i don’t mean an electronic tablet, I mean a piece of plastic covered in a compound that glows in the dark . usually around 8cm X 10 cm they are held behind a map so that the map can be read in almost complete darkness or put under a page in a note book so that you can write in the dark  all the while maintaining near perfect light discipline.making quick maps, noting force numbers . referencing maps  or signal schedules, frequencies and codesI made one of these the other day … with some glow in the dark tape and a piece of left over steel sheet. for about 1$ a simple piece of gear that anyone can use for discrete note making. especially in a world of electronic tracking and coms devices. manual is king 

Hwacha for defense against massed enemies


Hwacha, also known as “fire cart,” is a Korean weapon that dates back to the 16th century. It is a type of rocket artillery that was used during the Imjin War between Korea and Japan. The weapon was capable of firing a barrage of arrows and rockets simultaneously, making it a deadly force on the battlefield.

The hwacha consists of a two-wheeled cart that holds a series of vertical wooden frames. Each frame can hold up to 100 arrows or rockets. The frames are set in a way that they can rotate to aim at the target. The arrows or rockets are launched through a series of gunpowder charges that ignite in sequence, creating a shower of projectiles.

The hwacha was a formidable weapon, but its design was not without flaws. The wooden frames were prone to catching fire, and the accuracy of the weapon was limited due to the inability to adjust the angle of the frames quickly. Nevertheless, it was a powerful weapon that could devastate an enemy’s ranks with ease.

In recent years, the hwacha has gained popularity as a historical curiosity, and its effectiveness has been tested by various groups, including the MythBusters TV series. In one episode, the team set up a hwacha with modern materials and tested its accuracy and power.

The MythBusters team built the hwacha using steel tubing instead of wood, and they used modern rocket motors instead of gunpowder charges. They also replaced the traditional wooden arrows with foam darts. The team set up a series of targets and fired the hwacha at them to test its accuracy and power.

The results of the test were impressive. The hwacha was able to fire a barrage of darts at the targets, hitting them with incredible force. The team noted that the accuracy of the hwacha was not perfect, but it was good enough to cause significant damage to an enemy’s ranks.

The MythBusters team concluded that the hwacha was a formidable weapon that was ahead of its time. Despite its flaws, it was a deadly weapon that could cause significant damage on the battlefield. The team noted that the hwacha’s design was ingenious, and it was a testament to the ingenuity of the Korean people.

In conclusion, the hwacha was a remarkable weapon that was used during the Imjin War between Korea and Japan. It was a rocket artillery that could launch a barrage of arrows and rockets simultaneously, making it a deadly force on the battlefield. Although its accuracy was limited, it was a powerful weapon that could devastate an enemy’s ranks with ease. The MythBusters TV series tested the hwacha’s effectiveness, and the results were impressive. The team concluded that the hwacha was a formidable weapon that was ahead of its time and a testament to the ingenuity of the Korean people.

Lock down slow cooker bread


1 teaspoon yeast powder

3 and a half cups flour

1 and a half cups hot water

1 teaspoon Salt

3 teaspoons baking powder

Put the hot water in a large bowl

sprinkle the yeast in it and stir

add 3 cups of flour, salt and baking powder

mix until you get a good dough ball , add more flour until its not sticky

place a piece or wax paper in the slow cooker and place the dough ball in the center

put the slow cooker on low for 1 hour, the dough should rise and double in size.

set the slow cooker to hot and bake for 2 hours Remove and let the bread cool on a cooling rack before eating

can substitute the 1.5 cups of water, with half a cup water, half a cup milk and one egg. Or melted butter , and milk and and egg . so long as its around 1.5 cups of liquid. Experiment , its fun

No Yeast ? look here! https://civilizationsend.com/2020/03/30/lock-down-yeast-starter/

Bell tent’s for Emergency accommodation


The military use two broad categories when going into a camp ,offensive and defensive:

  1. Defensive- usually in trenches and dugouts, and offensive is characterized by mobility and concealment. The military will use large tents and bunks when they are camped for a long stay – and defend these with sand bags.
  2. Offensive – when on the move, they use small tarps and ground sheets, because these are lighter and can be setup when and where they are needed.

Bell tents are, in my opinion, one of the best long term tents for emergency accommodation, and long term stays for defensive situations.

So, what this means is when I go camping, I class my equipment into two broad categories,

  1. Ultra-light, hiking, bug-out, and “escape and evasion” style gear with low comfort and high mobility and concealment with a small foot print
  2. Heavy weight, base camp, Car camping, homesteading type gear with higher comfort and lower mobility, mostly when camping with the family.

A bell tent very much forms part of the second category, due to weight and how long it takes to put up and take down (which doesn’t take very long, but still is not super quick)

Bell tents withstand Wind which is very important in New Zealand , as wind is very strong here for a large amount of the year. also because we have many earthquakes, if my primary residence is damaged to the point it is no longer safe to live in, a large long term camping tent is a good idea.

Bell tents are quite heavy as they are usually made in canvas or a blend of canvas and polypropylene, and canvas is a great material for long term camping, as its way stronger then other materials and breathes well while staying waterproof.

Canvas is much nicer to stay in, long-term, as its also more soundproof and sun-proof than many other fabrics.

So why not add a long term shelter to you plans? I picked one up for $350 on a fluke 50% off special at the local camping store, they usually go for $700.

History channel alone season 6


Here is what I would take if I were invited :

Let’s hope they open it to international people, I’d go in a heart beat,

here are the 10 items I would take – depending on the location

1. Sleep bag -15 centigrade depends On location and season

2. Kukri – Smith and Wesson outback bush hog – its what I have,  don’t judge

3. Ferro-rod, of course.

4. Thick Wire, 16 gauge high carbon steel/ high tensile steel ( about 88m of it in the allowed 3.5lbs /1.6kg’s ) for trapping making hooks, nails, springs for traps and other stuff.

5. Hammock – large double net type Home-made from para-cord if they would allow it, it is a hidden source of cordage.

6. Rations -2.2 kg /5lb’s of Biltong as I’m a South African – but considering Pemmican as it has more calories

7. Multi-tool – Leatherman Rebar

8. Dutch oven Pot and lid – 2quarts/ 1.9 liters

9. Saw- large cross cut bow saw

10. Cold steel Spetznaz spade

So one thing you will probably notice is no axe, the saw should do the big work and the Kukri is perfect for battening wood to split, the leatherman will do the rest and it’s got more than one blade and a file to sharpen tools with.

The pot lid is also a good shallow pan.

The pot is nearly indestructible.

the ferro-rod is a no-brainer- ( updated might just got with the  Trench lighters i have recently discovered )

The hammock can be used as a hammock, but can also provide loads of cordage if required, and isn’t bad to sleep in, I can use parts of it to catch birds and fish with if i break it down and re-weave some of the strands.

The wire is good for snares and for making traps, making nails and tying things up. Improvising hooks with cord from the hammock for fishing, arrow points and fishing Spear points, I’d go with a high carbon steel – thats soft annealed, so it can be fire hardened by quenching to make springs if needed. and even forge small items if needed.

The spade is good in managing fire and for splitting wood, digging scat holes, digging for bait, digging turf in grasslands for walls and fire pits  and digging out traps elsewhere .

The Kukri, I just prefer them over smaller axes.

first thing i would do is scout the area … and find the best spot possible.. that why I would take the rations, setup a temporary shelter each day and move around till I found evidence of game and the best fishing / hunting spots.

Then I would first build a simple drag travois https://en.m.wikipedia.org/wiki/Travois, To carry all the gear and move it to the best area … somewhere not so close to the water and further up cause it’s generally warmer,  and has less bugs .

Then assess from there

I’d build more than one “lodge” if possible and move between them as trapping and fishing allowed, and food stocks dwindled.

I would essentially try to be nomadic.

again this is all dependent on the area, climate and season. 😉


New Dutch oven


Hey guys

Just got my new Dutch oven … can’t wait to break it in , it weighs about 3 kgs and hold about 1,8L of liquid , perfect for a small family of 4 ,

its much lighter than my older potjie, but its also way smaller in volume. Its  nice to have both but this one is much more … mobile .

Its got a great handle that stands on its own, and has a spring around so that it doesn’t burn your hand. but lacks the three feet and the round bottom of a traditional potjie pot.

It has a lid that can hold coals , and be flipped over and used as a pan, as it is slightly domed.

all in I’m very happy with the purchase .

it was about $30 US  including delivery.

Anyway here is a pic

Boat bug out


I have long contemplated using a boat as a bug out transport vehicle , as i now live near the ocean, this is a real option.

this should really read, “using a boat as a bug out location for the short term”

Boats have some obvious advantages:

  • They can generally hold quite a bit of gear, large boats can carry very heavy loads
  • They may move slowly but they have no need to go off road,
  • water covers a large amount of the earth and often contains a large amount of wild life that can be harvested,
  • They can be powered by the wind
  • They don’t require much technology, but can be enhanced with it
  • Repairs to small craft are not difficult,
  • They can be very quiet,
  • They have good ranges,
  • can use steam engines, Stirling engines, and low grade fuels.
  • navigation by sun and stars is well established and can be revived.

and some disadvantages:

  • Affected by weather,
  • Slow, when wind powered,
  • Obvious at a range,
  • Can be expensive to buy and maintain,
  • Relatively easy targets for Pirates
  • Limited to coastal areas,
  • a home port, with resupply is still required,
  • not all vessels are created equal – size and crew have a big baring on range,

The most important crop you can grow


If I were to ask you what the most important crop you can grow is. what would your answer be?

Some might say maze, but maze doesn’t produce much and is quite difficult to grow  in small spaces, if you have a few hectares of land maze isn’t a bad option. It is portable and requires very little preparation to eat, and is very dense,and who can forget the smell of fresh salted popcorn? they need good soil and need a full season to grow properly.
Continue reading The most important crop you can grow

DBEIF D2016 Survival Mobile Phone


UPDATE : Please note this only works on a 2G network – which means it wont be able to work for long anymore

the Dual Flashlight, FM, Dual Sim, Power Bank, TV, Mobile Phone everyone should have in there bug out Gear,

I don’t really often do gear reviews but this one stands out for me as an epic buy for your bug out bag, get home bag, or earth quake pack ,

Firstly it replaces 5 main items in your bag.

Its a torch — with a pretty long battery life,

an FM radio, we should always have one of those in a disaster ,, and having this in one package makes it lighter and takes up less space. i dont think you should completely remove a spare from the pack but its way better then using a cell phone and has a separate button for turning it on and off,, way awesome

its water resistant and impact resistant, and that equals heavy.. not a bad thing.

,It has a removable  battery , so a spare can be carried, epic…
Continue reading DBEIF D2016 Survival Mobile Phone

Thinking about building some Tracks for my Car


When speaking with some of my friends from the 4×4 community, they were rather scathing of my choice of off road vehicle.

I have a 2001 RAV4 4WD as my hunting/general day to day car.
and apparently this isn’t very good in “real off-road” bashing

car

But, the thing is ..
I already own it.
Its paid off.
its in great condition and has done low mileage.
They are common as dirt and parts are still easy to get and cheap.
Its lighter on fuel than many others.

some down sides
no diff lock, only limited slip EBD/abs
not great ground clearance.
Tyres are more for road then off road as its in use mostly on road
Continue reading Thinking about building some Tracks for my Car

Surveillance of a homestead


Ultimately surveillance is about using ears and eyes to gather information about a possible enemy and your surroundings, to get forewarning, to give you the largest tactical advantage, to plan an ambush or evacuate with as much warning as possible.

Extending coverage of these senses gives a longer warning, and more time for reacting to, or preparing for, a security threat.

In a scenario where our security is left up to ourselves (Without rule of law or WROL) we need to find

Continue reading Surveillance of a homestead

Nuclear War and Pandemic Survival tips


First off

get a Gieger counter NOW …. you can get cheap ones that will do well enough that plug into the audio jack of a cell phone  .. and cost under $35.

Decide whether you will  bug in and convert a basement room into a bunker, or setup a bug out fall out shelter far from your home either way Continue reading Nuclear War and Pandemic Survival tips

Are You Obsessed with Bug Out?


Do you have 5 bug out bags and keeps of bug out vehicles?

Ever wonder why you felt the need to do this?

I found one reason the other day …
the training manual for Nuclear survival from FEMA suggests that you should have them.

The main reason would be that, in case of nuclear war, you would need to move out of the cities to build a fall out shelter to survive, as Rural areas were less lightly to be bombed.

This seams to drive a lot of the arm chair warriors theory behind bug out.

Continue reading Are You Obsessed with Bug Out?

Lessons in First aid for Bullet Wounds during the past World Wars


Treating large Puncture wounds/shrapnel and bullet wounds  in the past was a rather difficult affair.

I went to the war museum the other day, and I paid careful attention to the past medical procedures, looking at how things were done in the past, because the more “low tech” you can go, the more sustainable your method will be.

what I noted was the following: Continue reading Lessons in First aid for Bullet Wounds during the past World Wars

Why you should buy a “Potjie Pot” or a three Legged Dutch Oven


Why should you buy a “Potjie Pot” or a three Legged Dutch Oven?

I finally had some time to put pen to paper ( or finger to keyboard lol ) and give a little info why you should get one.

these are heavy three-legged cast iron pots used in south africa to cook food …

here is why you should get one and have it as a Bug in tool : Continue reading Why you should buy a “Potjie Pot” or a three Legged Dutch Oven

Maps


One very important prep that is often overlooked are good area maps on Paper …. everyone should maintain a map and you would be wise to create an overlay made of clear plastic with a permanent marker and a dry wipe marker with notes on areas on interest .

the local military bases,

Food supply caches ,

hardware stores ,

and civil services in your area …

Create a map using https://inkatlas.com and print it out — preferably in no more then 1:50000 resolution


Update: Inkatlas is no longer doing free maps like they used too ; ( but its still a great service and not too expensive


Trapping and Fishing vs Hunting


The progression from hunter/gatherer, to formal agriculture is a major reason for man’s success,

Hunting, however, is a great start when agriculture fails.

Hunting is a great sport but ultimately trapping and fishing are going to feed a family a lot for longer and with much less effort, as they multiply the effort of a single person and could provide for a surplus of food for trade.

Trapping of birds is the simplest of affairs, and ,while rather cruel,can be done with fish hooks and bait,

or possibly nets, and other falling traps, even mouse traps.

Continue reading Trapping and Fishing vs Hunting

How good is an Air rifle for long term Survival?


Air rifles are often seen as weak, and not very effective hunting weapons, and  while the smaller caliber modern air rifles ( under .25 ) are not great against human targets, they have some merit.

Firstly I’m talking exclusively about single shot spring / gas piston guns.

Air rifle pellets are cheap and light.

Air rifles are relatively cheap – but a cheap .22 rifle is still cheaper, and a good powerful air rifle will be much more expensive.

Continue reading How good is an Air rifle for long term Survival?

Its time for an update on NZ


Hi Everyone

Its been ages since I found the time to Blog, so here goes.

Life here is very different to what I am used to, but not in a bad way.

Loads less crime, and first world problems, no loads shedding, but the cost of food is astronomical, compared to South Africa.

a meal at the Mac Donalds will set you back around R100 a head.

Essentially there are no big malls, but the city is like one big mall. a real change from JHB.

Continue reading Its time for an update on NZ

Bugged out


ho guys it’s been a while but it’s mainly cause I’ve bugged out … I’m sitting in New Zealand … A 10 year plan in the making … Family to follow in the next few weeks … Missing them excessively and ready for the whole new adventure … I’ll pop in from time to time but prepping here is a whole different ball game and I have much to learn .. When I get a chance I’ll write an article about the process of leaving my home behind for new pastures

Load shedding – off the grid


I’m going to try very hard not to complain or rant…

Preparing for planned power outages over the last few years has meant I have bought a generator, and many smaller solar powered security devices, and the discussions at the office have lead to load shedding almost exclusively in the last few weeks…

lets face it , it sucks, and shouldn’t be necessary with some planning on the part of the publicly owned power providers, many guys are looking at solar,  inadvertent side effects of load shedding is that many are looking to go off grid now .and that’s good for business if you sell that sort of thing and its better for the planet ( well sort of ).
For private use, going off the grid, is actually quite easy, point solutions actually rain supreme, when it comes to cost, and scaling up. a bit of good planning goes a long way. Continue reading Load shedding – off the grid

Seed bombs


My first post for a long time.

Ive been very busy with many projects, tiling and loads of DIY at home and its also the Year end rush, at my day job, to get things done before year end , so I’ve been too busy to prep.

the general Idea with a seed bomb is to find all the open land in area’s around where you live and make an investment in your own survival, buy a bag of popcorn kernels, a bag of gem squash ( or a big pack of gem squash seed), a bag of broad beans ( or a big bag of Bean seeds), Continue reading Seed bombs

Solar cooking for SHTF


Hi all

I’m going to be building a solar cooker, it feels like a good idea.

I will never be able to grow enough wood or produce enough gas to boil water and cook food indefinitely, the solution is to use that for lighting and heating, and use the sun for cooking. Its good for stealth, because it doesn’t smoke, the sun is very strong here in southern Africa so it should work well…

I’m going to get an old DSTV dish and coat it with foil as the reflector. that setup with a potjie or dutch oven which is already black , and I already use quite often … should make cooking simple…

I will post picks here when done .. as always

Sorghum Millet- grains for guerrilla gardening


Sorghum Millet- grains for guerrilla gardening

Hi Everyone

As some of you know, I often advocate responsible guerrilla gardening,

guerrilla gardening is planting on land that isn’t really yours – crops that someone can eat, that are not obvious to all, that are edible …

my favorite for jhb is pearl millet — or sorghum – they are really cheap – R20 a bag for 200g from these guys

www.sproutingseeds.co.za/products-page/other-seeds/millet-seeds/

Straight from Wiki

Sorghum bicolor,native to Africa with many cultivated forms now, is an important crop worldwide, used for food (as grain and in sorghum syrup or “sorghum molasses”), fodder, the production of alcoholic beverages, and biofuels. Most varieties are drought- and heat-tolerant, and are especially important in arid regions, where the grain is one of the staples for poor and rural people. These varieties form important components of pastures in many tropical regions. Sorghum bicolor is an important food crop in Africa, Central America, and South Asia and is the “fifth most important cereal crop grown in the world”.

Sorghum grows really well here and can provide grains for bread and other things, and is not immediately recognizable to most of the population as food , so its a good back-up crop.

Plant the crop on open land and let it grow, and reseed itself . Obviously don’t choose invasive crops and be responsible.


Building techniques for a post modern culture


In my searches on the internet i often stumble across info that is new to me and might be useful to other in the prepping community

One of these such items is the catalan vault

 http://en.wikipedia.org/wiki/Catalan_vault 


the catalan vault is a really great idea and can be manufactured with limited resources, is very solid and can provide very stong buildings.

 http://architecture.mit.edu/class/guastavino/features/ramage/index-ramage.htm#

http://block.arch.ethz.ch/

the tiles used in the vault can be simple clay dried in the sun . and can be stuck together with a simple plaster –

http://www.notechmagazine.com/2011/12/sustainable-urban-dwelling-unit-sudu.html


check out some of these links for more info


Calcium carbide – and its uses


Calcium carbide can be produced by cooking Quick lime  and charcoal together at a very high temperature – approximately 2000 °C

CaO + 3 C → CaC2 + CO

It was invented in 1888, when wet with water it produces acetylene, that can be used for many purposes – even to run a  car, an engine or a generator, and provides a portable source of uncompressed gas for lighting and cooking.

it is hot enough to be used for welding with the hot flame it produces when mixing the gas with pure oxygen.

the process of producing Calcium carbide is of great interest to those prepping simply because it is sustainable, using very basic ingredients, and quite low technology.


you can get a hot enough flame to make this by using an arc welder with a carbon rod .

Air Rifles for survival


In the last few years in south Africa the law regarding Air rifles has changed , and they are no longer required to be licenced,

so long as they are under .22 calibre and ( I maybe wrong here ) under 9 foot pounds of muzzle energy.

so a nice powerful .177 calibre rifle is well within the reach of most people.

While this isn’t much good at protecting a household from anything , its a very effective weapon to hunt small animals and birds, and while it is illegal to hunt with an airgun, in South Africa, if the SHTF , they could be used to take pigeons, and other birds, rabbits, cats, and other smaller animals or scare off dogs, and other predators. Continue reading Air Rifles for survival

Green laser Pointers


Green laser pointers are excellent signalling devices and should be included in any emergency survival bag, they are light and can signal aircraft and even others on the ground much like a flare gun.

when combined with Morse code you would even be able to send messages to others simply by shining it upwards in the sky at night and coding out the message.
obviously everyone would be able to receive the message and would see where it was sent from, but this is not always a bad thing, and for messaging over a few kilometres, would be better then a flare gun with only a few flares ..

Old tech for a new use, the ww2 german army zeltbahn Poncho


Creating one of these is really easy and if done well, can replace poncho tents

Being a “grey man” is great but sometimes you also need camouflage.. the german army used these poncho’s to provide soldiers with rain protection and camouflage.. they can also be adapted to form tents and sheltars when used in groups

check out http://www.zeltbahn.net/

http://www.zeltbahn.net/tent.htm

Zelt31

a few notes on SHTF firearms


Hi all

Ive been reading the forums lately and have seen some posts on SHTF firearms that really make me smile.

One guy has 3 weapons and ammo along with a Kevlar vest… but only 3 days food, in his bug out bag.

this really doesn’t make sense to me

for bug out you are probably going to need to have as much food as possible, and if you are moving you wont get time to hunt,  so what would you do with all that ammo and that many guns?

the person in question said they have a shotgun , a pistol and a .22 rifle in semi auto.

without knowing the persons plans i am not able to say too much, but thats seams a little over kill for any situation  to the point that carrying all three will make you inefficient at combat or hunting in any case.

my 2 cents worth is simple — loose the long guns – if you are moving through urban areas .

take the shot gun if you are going short term in the wilderness.

and the .22 if you are going to stay long in the wilderness.

if you have ever served in the military you should know that carrying more then one weapon is going to be a pain , during my service I realized that the lighter the better, now I only carry a pistol, and would prefer a pistol caliber carbine over anything.

Pistols are not great weapons, but the reason I advocate this is simple, they are lighter, and you really need MUCH more food then you think and WATER is extremely heavy.

Officers use submachine guns rather then a rifle, most of the time, simply because it is lighter and has more compact ammo with good accuracy. leaving space for food and water, when resupply is uncertain.

rather have 15 days food and water and a pistol that you will probably not need then dehydrate.

bottom line is you cant eat shotgun shells.

Issues with 9mm casings —


Without really looking I reloaded 100 rounds on the week-end , at the range i had 6 casings where the primers fell out in the magazine . failing to allow the weapon to go into battery and messing powder everywhere.

I was lucky that nothing blew up …

I picked up the casings at the range and hadn’t properly checked them – but it looks like “durapoint” (or somthing like that) reload’s, in the orange box, has been reloading berdan primed casings with boxer primers .obviously drilling out the old primers anvils which works just fine with the primers they use, once … but when reloading the primer pockets are stretched.

My winchester primers seem a little small and they were falling out … while they felt fine and looked fine on the press.

Needless to say I ditched all the berdan primer casings from my brass stash and now will sort my range brass a little more closely.

Sod house


http://en.wikipedia.org/wiki/Sod_house

The sod house or “soddy”[1] was a corollary to the log cabin during frontier settlement of Canada and the United States. The prairie lacked standard building materials such as wood or stone; however, sod from thickly-rooted prairie grass was abundant.[2] Prairie grass had a much thicker, tougher root structure than modern landscaping grass.

Construction of a sod house involved cutting patches of sod in rectangles, often 2’×1’×6” (600×300×150 mm) long, and piling them into walls. Builders employed a variety of roofing methods. Sod houses accommodate normal doors and windows. The resulting structure was a well-insulated but damp dwelling that was very inexpensive. Sod houses required frequent maintenance and were vulnerable to rain damage. Stucco or wood panels often protected the outer walls. Canvas or plaster often lined the interior walls.

Sod houses can stop bullets and can be made for next to nothing …they may no last forever but can be made quickly and last for many years if done well…

sod houses require only hand tools to construct and would make a great bug out location temporary structure as most of Gauteng is covered with grass lands ..

my ideal bug out location would include a house of brick, sod or sandbags , in the form of a court yard house .. these are usually constructed with windows facing inwards and a central pond for fish and drinking water … with all roof run-off going into the pond in the middle … all windows face inwards and fruit tree’s are grown in the court yard providing shade and food.

the outer walls are at least 3 meters high and very thick – only very small windows set high on the wall would face outwards

– 2 sets of gates- with inner and outer gates. and a dry mote to stop vehicle rams, complete the setup .

below grounds storage and underground safe rooms – or bunkers provide a last line of defense .

obviously, inline with my other posts, a number of  lines of fences and trip flares .

My new pri-bar tomahawk project


image image Hi guys … Been very busy but just a quick note … Here is a glimpse of the chisel I’m turning into a pribar tomahawk … It’s also a hammer and a knife … Got the concept of the idea from red scorpion six Mohawk … Look it up on the web for more details .. any way Gtg bye … From my mobile i started off with a brick cutting cold chisel … its very tough .. and heavey … about 2 pounds or 1 kg when i began, it should take a good edge cause its a good quality steel… cost me R80 or about $8 US … and when im finished it should be a really good axe, pribar, knife, hammer and chisel combo. nice thing is its smaller and lighter then the tools described put together and much cheaper then the Mohawk


—–progress update—–


works really well … even without a handle attached .

still allittle left to do to make it look nicer .. got loads of filing to do and a little paint wont hurt but i cant wait till its done …


2013-12-27 10.45.46

Investing in silver and gold


In the case of localised economic disasters
Gold and silver are excellent ways to preserve your purchasing power, when the economy crashes your silver will still be worth something to someone and so even when the Rand slides against the dollar physical precious metals still hold value.

Paper money and coins with a face value can easily lose value when inflation hits and can be devalued by the central banks — silver and gold bars cannot be.

Coins like the Mandela coin are based not on the value of the metal but the value people are prepared to pay for the face value – this is highly inflated.
Continue reading Investing in silver and gold

Shooting challange


Shooting challenge — post you results in the comments if you like.

Went to the range yesterday and started my new training program

Drill – to learn to draw and change mags correctly.
Rounds – about 100
Action – load 2 round into your pistol and 2 rounds into each additional magazine ( minimum 1 normally 2)
Target – man-sized, stationary
Distance – 20 m / +-60 feet
Method – address target , draw, Fire 2 rounds, change mags, let slide loose, fire 2 rounds, change mags to empty mag, dry fire, change mag to other mag with ammo, fire 2 rounds, change mags to empty mag, dry fire, make weapons safe,
reload and start from scratch.
Objective – to draw and fire and reload accurately, then speed up as you become better at this, then work on accurate fire, when quick.

– my results were quite good …
all shots on central mass, no fumbles, not exceptionally quick, need to review my holster setup, its slowing me down.

Home made MRE in South Africa


While reviewing my Get home bag, and after doing some research I found some great idea’s on homemade rat packs .

While the oat survival bars in one of my older posts are great, they can get boring,
so I started out with dehydrated stuff
so now the pack has:

1 instant oats
1 instant soup
1 pack Oros powder
1 small pack of instant mash – Smash
2 tea bags
4 pre-packed sugar packets
75g of compressed Dates
125g of Knorrox Savory Soya mince – re-packed from the 400g packs
1/3 oat survival bar listed elsewhere

total – 7200 kilojoules – probably a little light at 1720 calories —-

“Get home bag” issues


I have once again reviewed my get home bag as i do a number of times a year to get optimal performance out of the bags contents as I learn new techniques and discover new ways of doing things

For one my original bag is over-stocked with medication and ammo, and could probably have sustained me almost indefinitely,
but it weighted in at over 12 kg’s, and was a pain to carry (even though it was kept in the boot of my car I would still need to carry it if SHTF.)
Continue reading “Get home bag” issues

My Idea for an improvised backpack


veshMy Idea for an improvised backpack would use a pair of old pants and some rope

Cargo pants or BDU pants work well as they will have external pockets you can use for smaller things

the idea is to make a pack similar to a Veshmeshock http://wp.me/p1Ff3c-h3

Take the pants and lay them out legs facing down

tie the legs together and closed with a small piece of rope

Tie another longer rope that will form the straps to the  first small piece with a large gap

Fill with stuff …

tie top like Vesh ….

and now you have rope and a spare pair of pants for no extra weight


Soviet Army veshmeshok back pack


Soviet Army veshmeshok back packs are really cheap and a nice big pack for those on a budget . they are low tech and very tough .


I found them for sale for only R210 at http://tacticool.co.za/shop/index.php?route=product/product&product_id=1560

http://www.rusmilitary.com/images/soviet_rucksack.jpg

video of how to tie it up http://sovietarmystuff.com/images/sidr.avi


vesh


so I came up with idea to make my own will post it soon … Should be free to make as its all from old scraps most guys will have at home…


Scouts


Scout Oath or Promise

On my honor, I will do my best
To do my duty to God and my country
To help other people at all times and to obey the Scout Law

Scout Law

A Scout is:
Trustworthy,
Loyal,
Helpful,
Friendly,
Courteous,
Kind,
Obedient,
Cheerful,
Thrifty,
Brave,
Clean,
and Reverent.
Boy Scout Motto

Be Prepared!

Hail in the vale


On the 20th of October  at 14h30,  Johannesburg time, my house was hit by hail the size of tennis balls and some up to the size of  a Cricket ball, breaking most of my north facing windows  ( about 15 in total ) and breaking straight through my roof tiles and my roofing boards in some places, luckily no one was hurt, and my cars were under cover so they were not damaged.

Firstly I must mention that i was shocked at how powerful the hail was, and how vulnerable the roof is , even on a relatively strong  building, it made me very aware of how fragile houses actually are, South African houses are not designed for extreme weather as it isn’t something we get very often. our windows are thin and not safety glass, our roofs are tiled but the tiles are not as strong as you would believe. and the impact of hail is much more dramatic then one would expect.

Fortunately being prepared for natural disasters is something I try to do and I had about 40 spare roof tiles that the previous owner left behind when he moved out ( he was also the builder of large sections of the house), so my friends and I climbed on the roof and fixed the majority of broken or cracked tiles. ( once again thanks for your help, I hope you enjoyed the potjie )

This was a great opportunity to see who I can rely on in an emergency, and it was interesting to see how people react to needing to help others, or themselves.

Link to pics of the hail.

Pistol Carbine System South Africa


Licensing a firearm in South Africa can take anything up-to a year and so many don’t bother and few gun shops survive the lack of  cash flow.

According to the new law you may only have one hand gun and only one gun under section 13 which is for self-defense

this is also the only semi-auto weapon you are allowed, under conventional circumstances.

This dictates, that if you need a firearm for self defense, you should buy the best and most versatile handgun you can.

the 3 most common weapons i see purchased are the following 3 :
Continue reading Pistol Carbine System South Africa

High intensity lighting using gas.


 Useful retro tech to make search lights and other light types to illuminate fortifications — dont forget to read my other article on how to apply this  ie use a reflector and harden your lighting

…or elsewhere in my blog where to get gas from I.e methane from a biomass digester .

“Limelight (also known as calcium light)[1] is a type of stage lighting once used in theatres and music halls. An intense illumination is created when an oxyhydrogen flame is directed at a cylinder of quicklime (calcium oxide),[2] which can be heated to 2572 °C before melting. The light is produced by a combination of incandescence and candoluminescence. Although it has long since been replaced by electric lighting, the term has nonetheless survived, as someone in the public eye is still said to be “in the limelight.” The actual lights are called limes, a term which has been transferred to electrical equivalents.”from wiki 

The role of Ferro-cement for Fortifications


Sand bags are good but soon rot … i prefer this method

Ferro-cement is a method of construction ( there are many ways to do it but here is mine) where you make a frame of steel mesh (about 2 inch mesh) … and attach chicken wire to it every few links. 

or start with EMPTY  Gabion’s   , ones of the right dimensions,  — preferably a thinner type like 1 a foot thick or less  – they are made in many sizes — 3 foot by 4 foot by 1/2 a foot and use them as you would bricks .. tying them together with wire, obviously with the 1/2 foot being the width of the wall.

kinda like this (please excuse mspaint art)


Then attach the chicken wire to the outside of the wall and what will form the inside and plaster .

Plaster with a very fine plaster mix on the chicken wire — let it set and re-plaster until its quite thick .. maybe 1 inch

Continue reading The role of Ferro-cement for Fortifications

Garrison


I said it a hundred times, get a garrison together — community rules … western military doctrine always maintains that only troops can hold ground…

This is idealistic and not my plan exactly but its an idea that can be applied elsewhere.

I would say the ideal in suburbia is the close off your street at both ends with a barricade ( we have this already ) .. get everyone in your street on board … link all the houses with radio or field telephones … establish a central meeting hall and guard house to coordinate everything, and provide a central kitchen, and central alarm should everyone need to wake up at once .

Dig the road up around the block to about 2 m deep and pile the rubble on the inside to form a parapet … use what you can to make a wall … cars … sand bags .. roof sheets with gravel whatever .. this is really just a trench to defend from. make a single entrance where the road is OK …

Continue reading Garrison

Toilet paper after SHTF


luffa ; ) on a stick …. wash and reuse – roman style ; ) in the army you call toilet paper white gold for a reason ; )

Luffa are edible fruit of a vine that grows well in south african climates  . and can be eaten while young or left on the vine to dry out to make Luffa sponges that can be used for all manner of things including to wipe your bum 😉

they are renewable, disposable and bio-degradable

http://en.wikipedia.org/wiki/Luffa

http://www.luffa.info/luffagrowing.htm