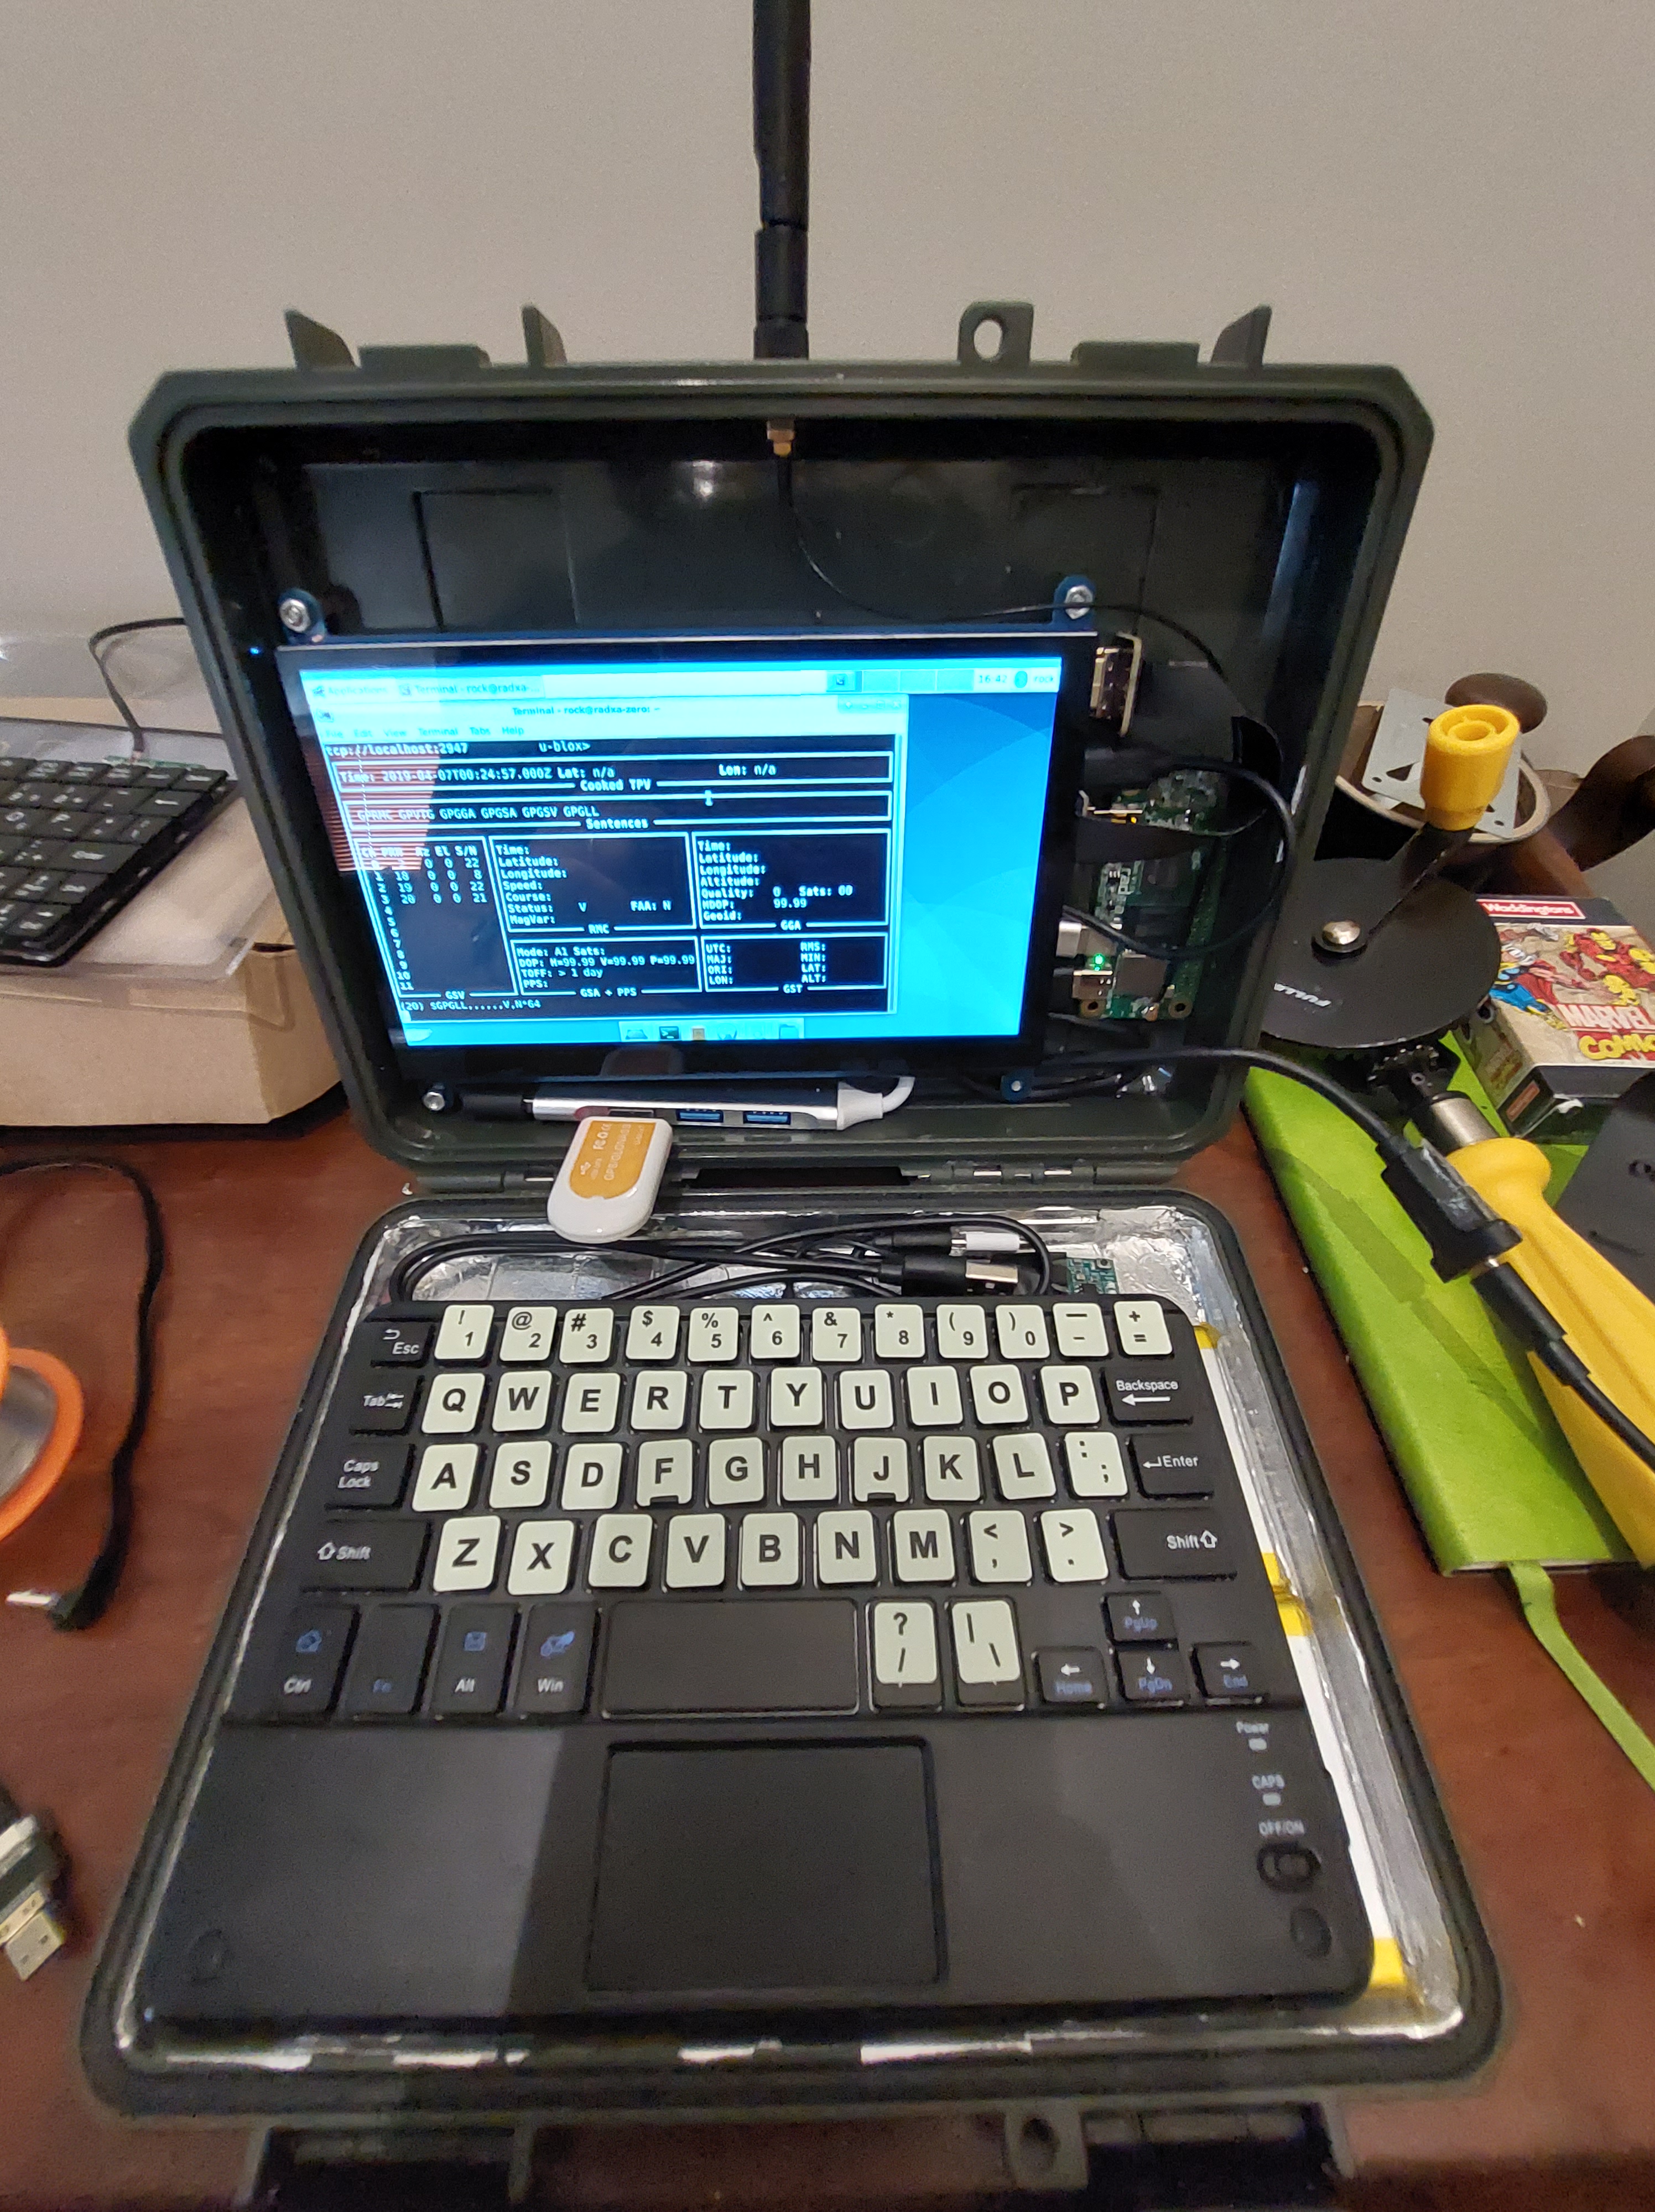
OFF GRID, HACKABLE MOBILE COMPUTER Version 2 OGHMC v2 ; )


OGHMC v2

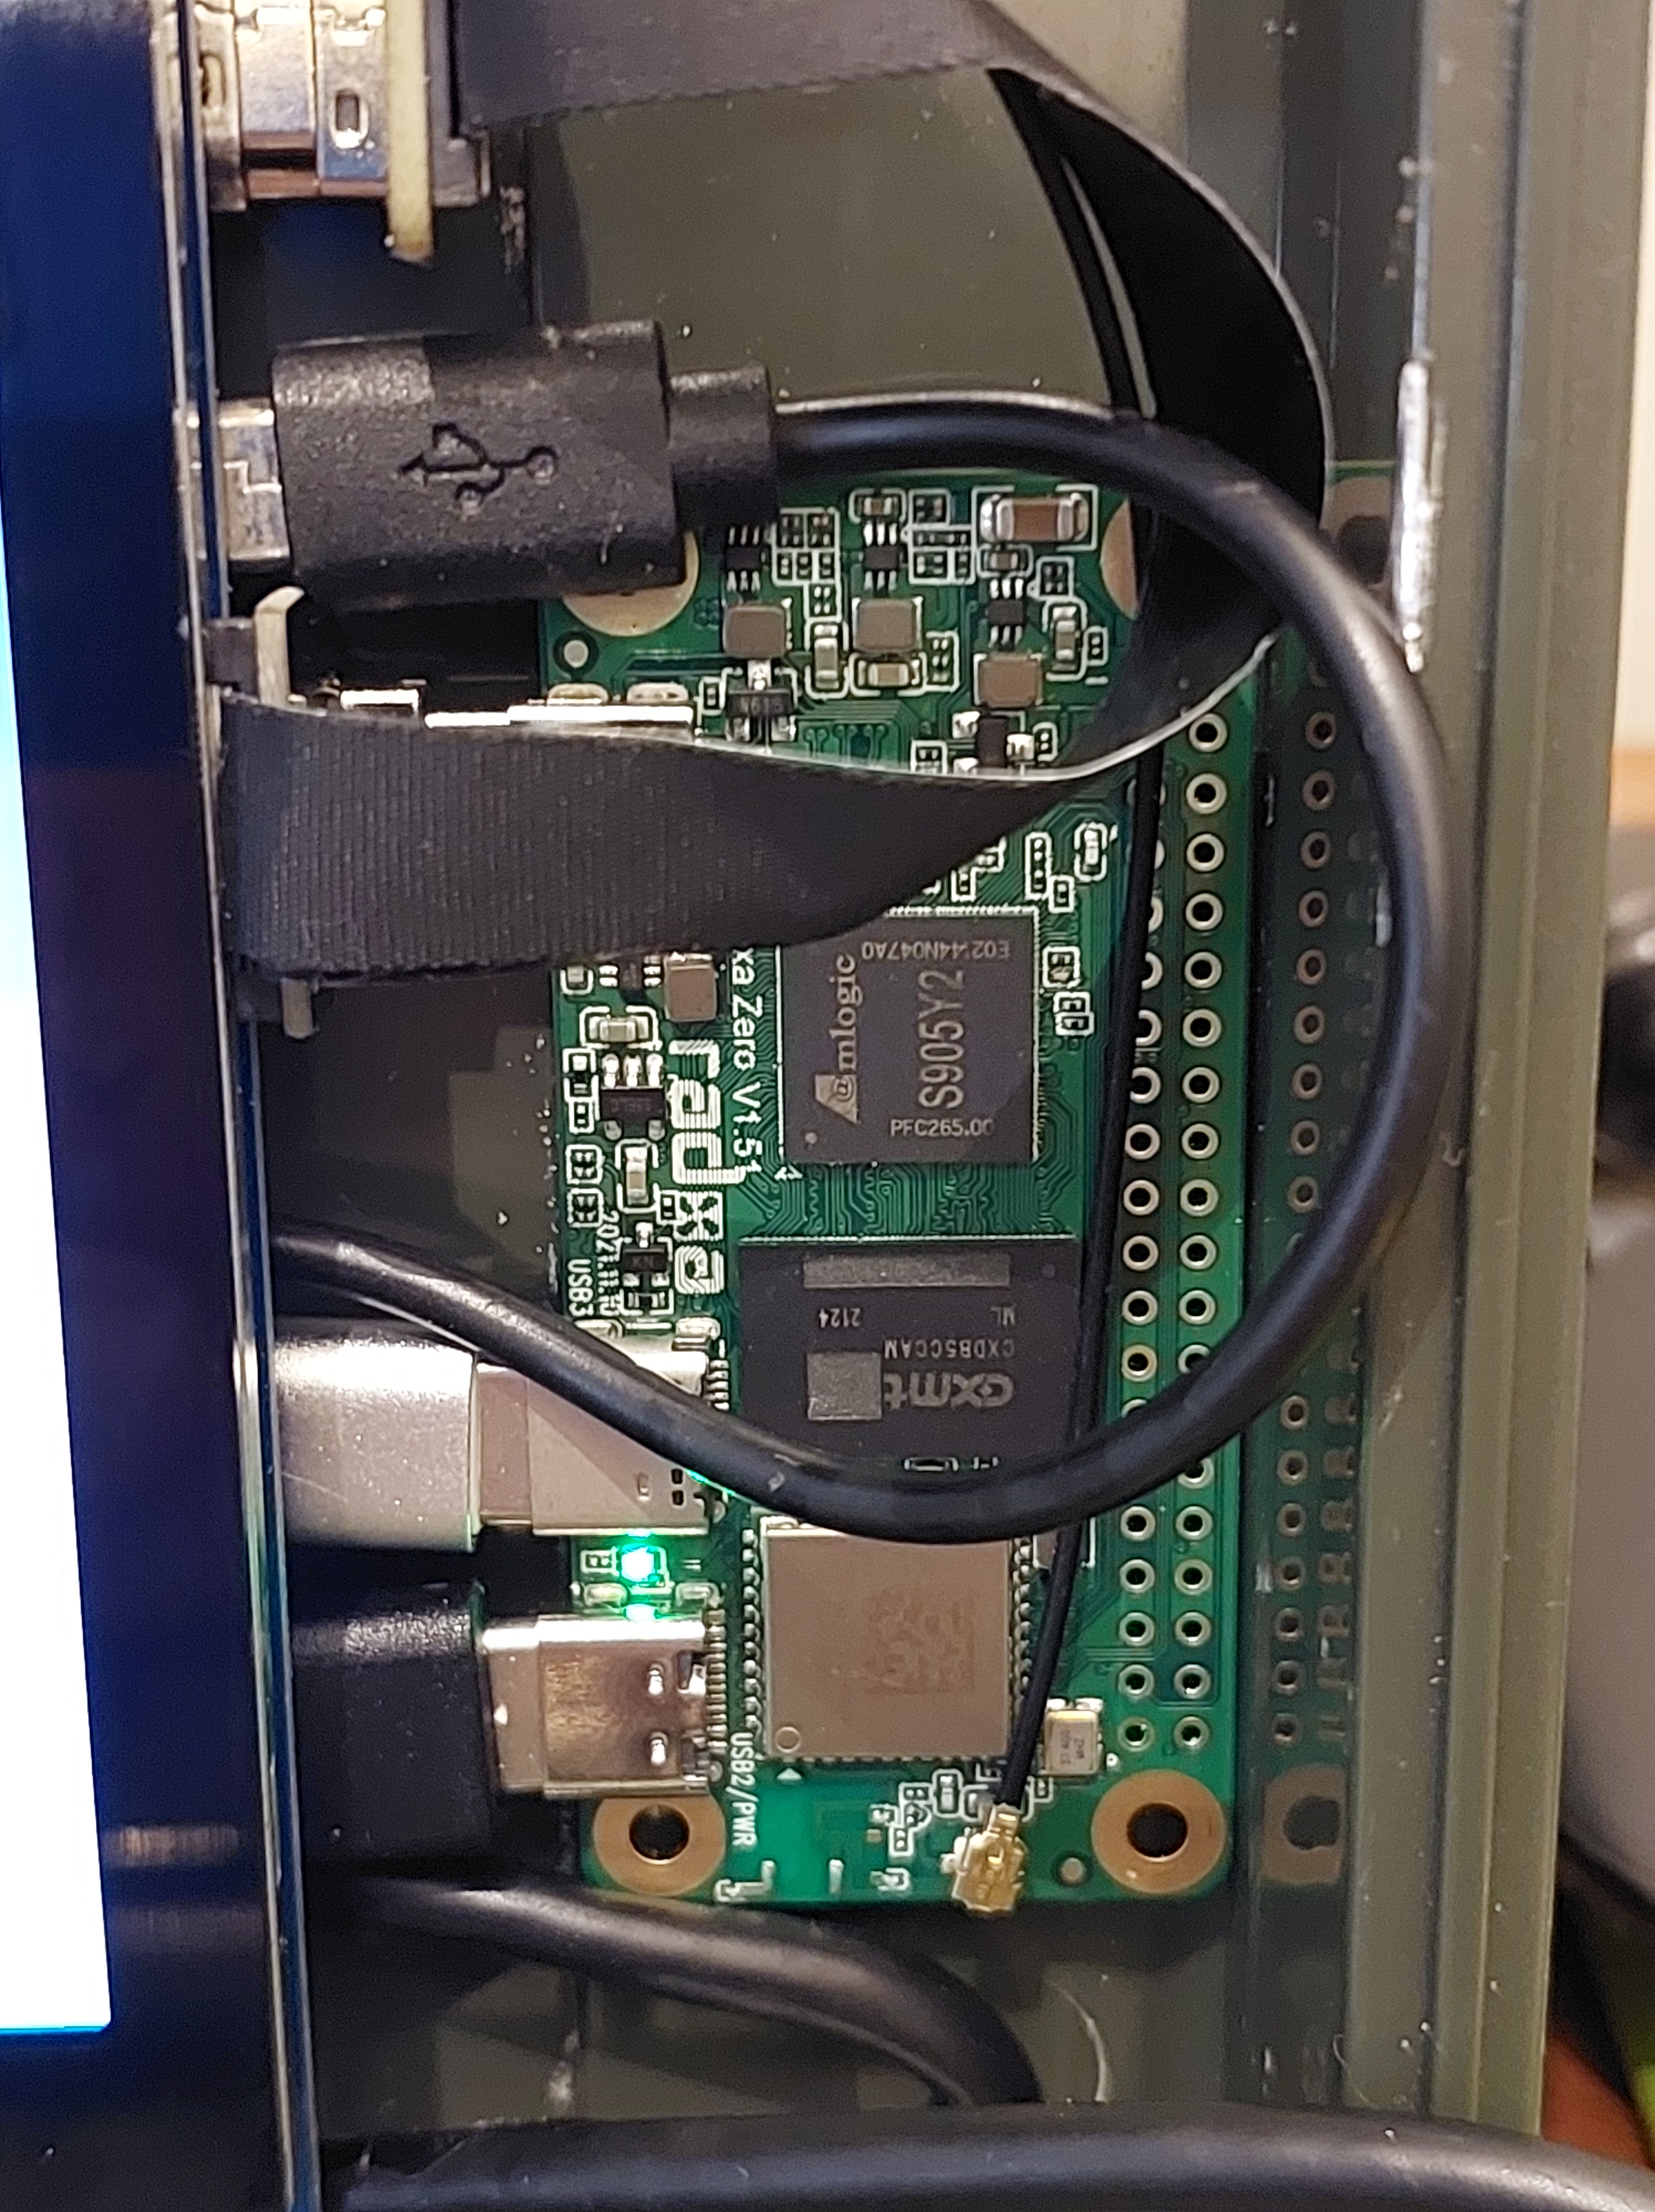
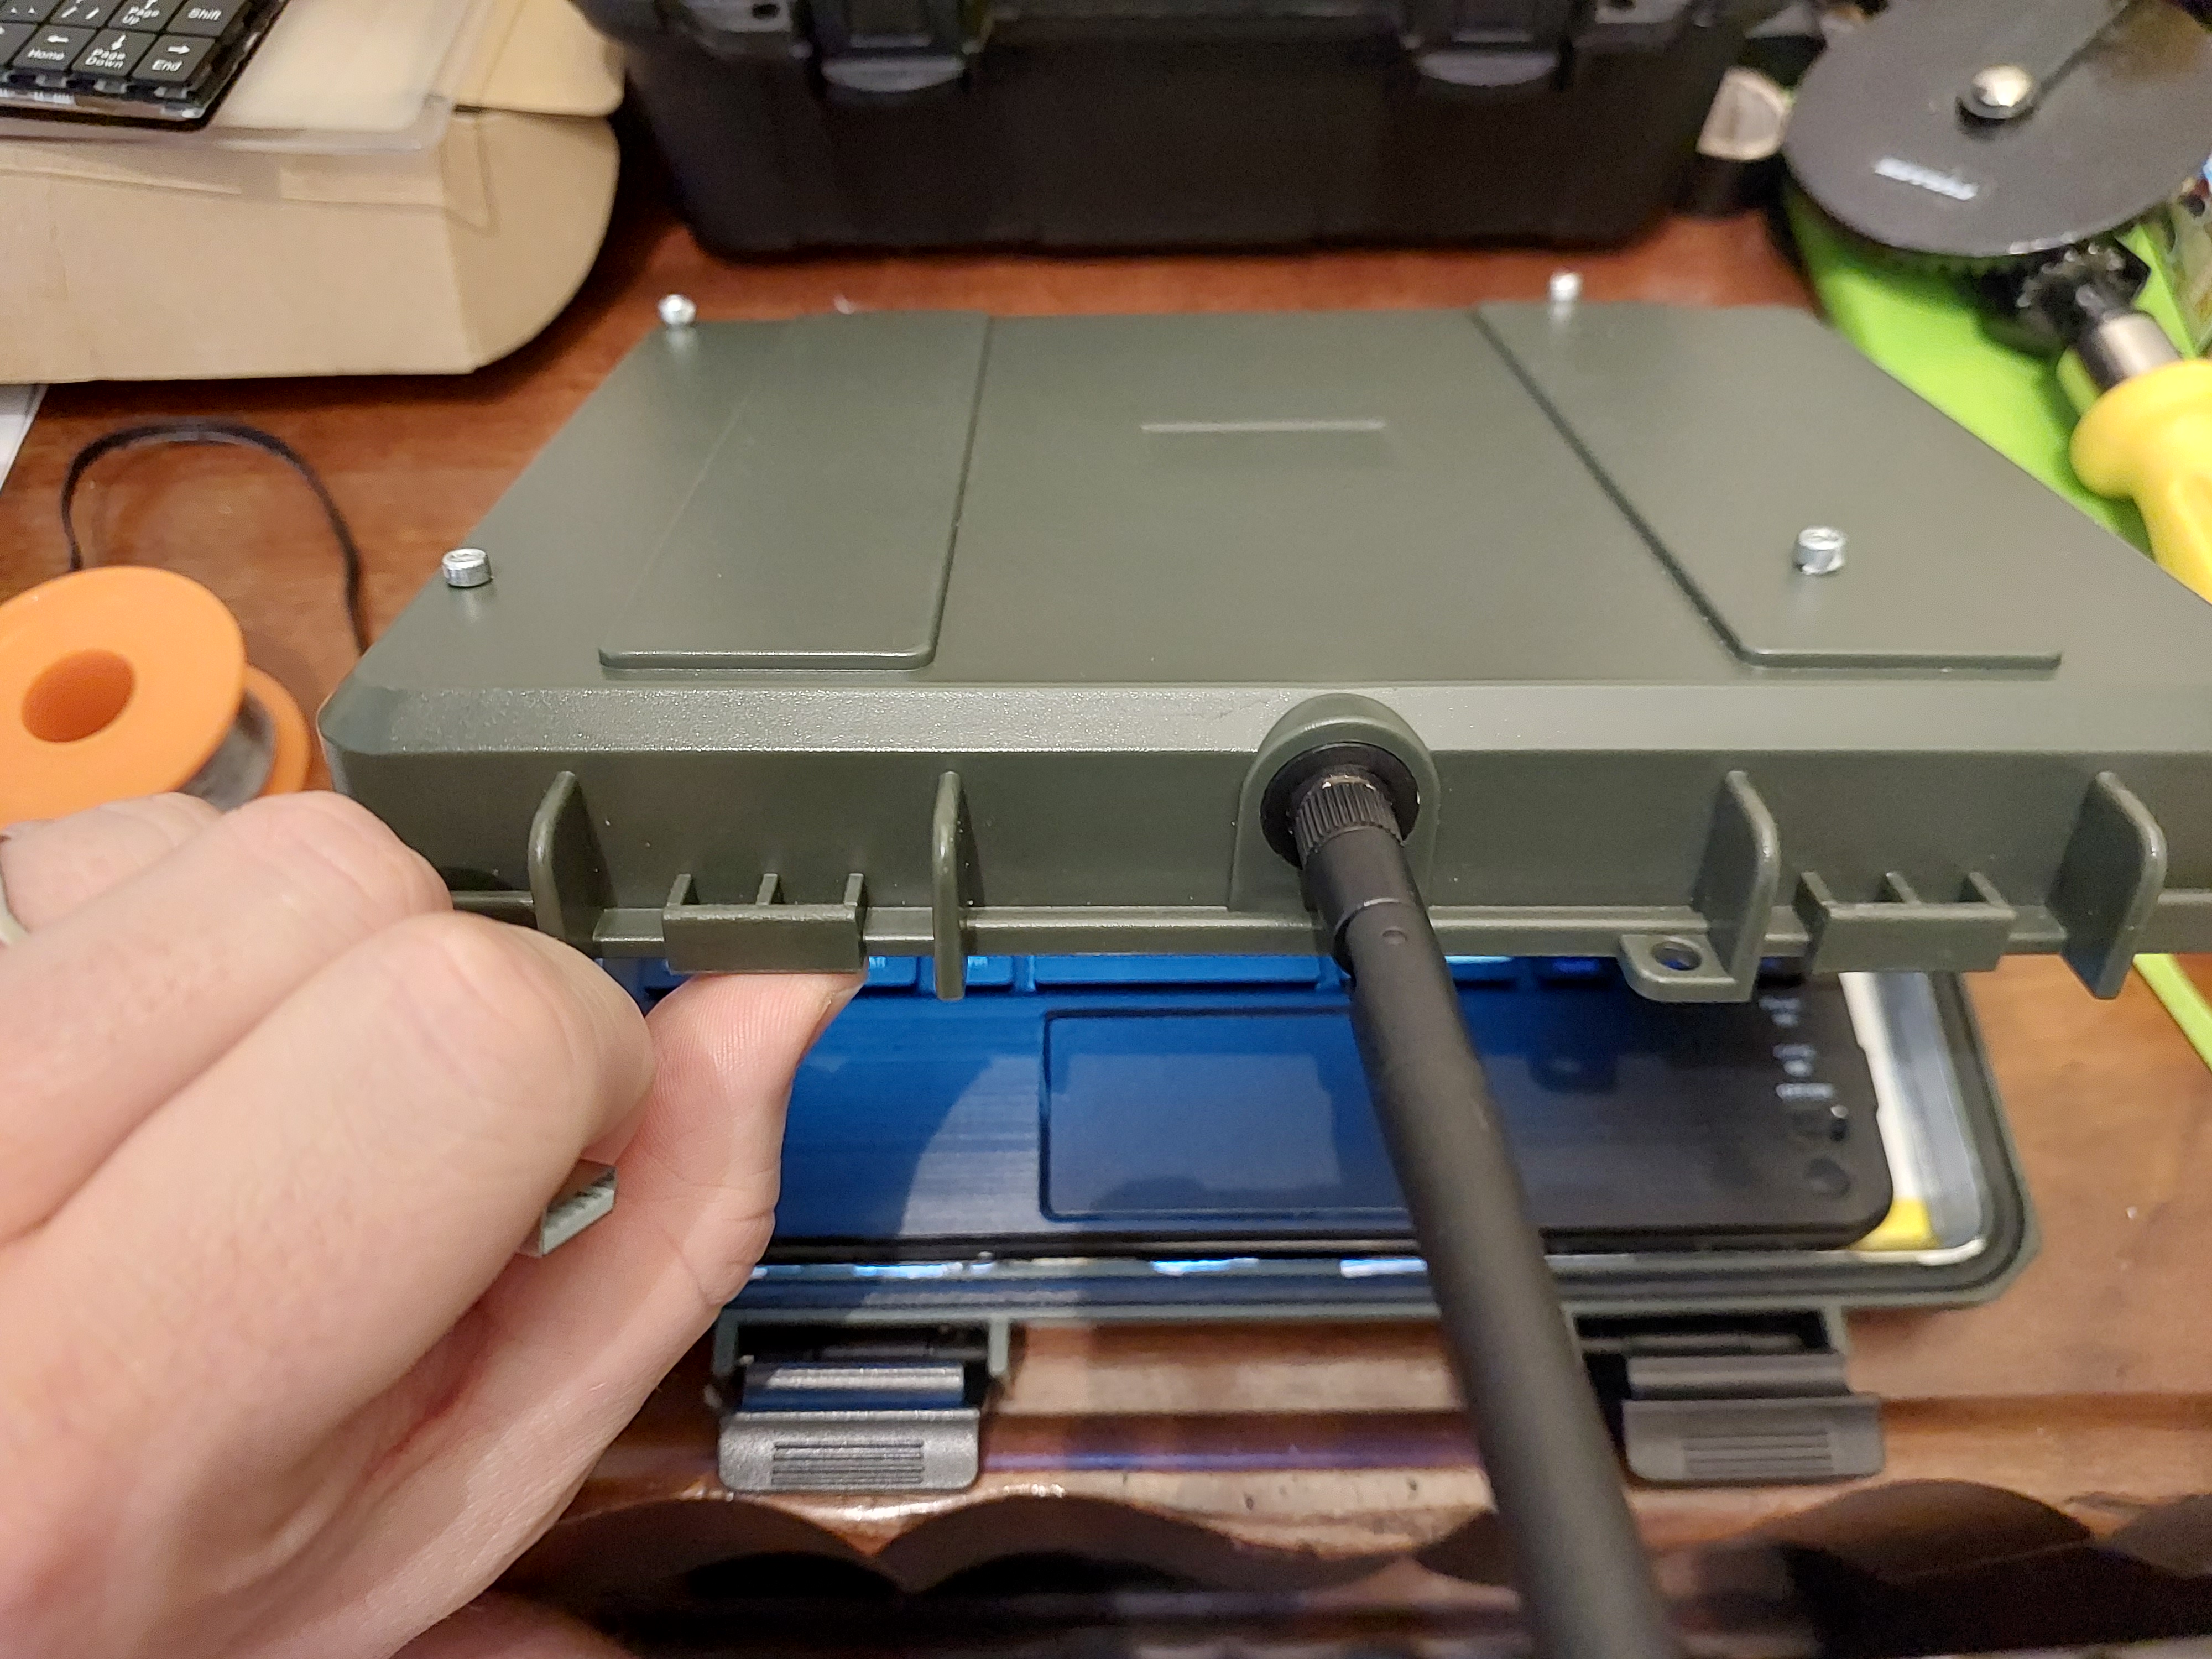
This new build i built with the Radxa Zero with external WIFI antenna, comes with an extendable WIFI plug “U.FL (UMCC) to RP-SMA” that can be mounted outside ,

One of my biggest struggles with Debian was getting the external WIFI modules to work reliably and i found the rtl8188etv i was using particularly bad, while it does allow you to put the WIFI into monitor mode with Kali Linux it just sucks having to spend 2 -3 hours recompiling the kernel to get the drivers working, only to do an update and they stop again.

The external antenna helps with removing the need for the rtl8188etv module and solves any issues with range.

the keyboard is now replaced with a simpler blue tooth keyboard and track pad combination

it is WAY less stress and I already had one in my workshop, i still have the on screen key board with the touch screen and the “mouse” also working as part of the touch screen. until the blue tooth connects.

it does require a charge but the battery lasts ages.

i added heat sinks to the build . not so much cause it gets hot but cause i had them lying around an cooler is never bad.

I found a good charging board which ive upgraded, and connected to the batteries. it includes a buck and boost converter so you can control the voltage of variable inputs . means it can run on any 3v to 24v supplies as long as it has enough amps.

the screen is the same as before but I found the glue and bicarbonate of soda hack to work for only a few months, then it gave way, so i drilled the case and mounted it properly with screws. the case is still as water proof as it was, they are not perfectly water tight anyway.

i am looking at also upgrading the USB hub with Ethernet, its hardly ever used in most applications of the OGHMC but its good as backup

New Version Pics below

Best ways to preserve meat without refrigeration


Preserving meat without refrigeration can be challenging, but it is possible. Here are some of the best ways to preserve meat without refrigeration.

  1. Curing: Curing is a traditional method of preserving meat that involves rubbing salt and other seasonings onto the meat and allowing it to dry. This process removes moisture from the meat, making it less susceptible to spoilage. Sugar, nitrates, and nitrites may also be used in the curing process to preserve the meat and add flavor.
  2. Smoking: Smoking is another traditional method of preserving meat that involves hanging the meat in a smokehouse and exposing it to smoke from burning wood or other materials. The smoke helps to flavor the meat and preserve it by inhibiting the growth of bacteria.
  3. Drying: Drying is a method of preserving meat that involves hanging the meat in a dry, cool place and allowing it to air dry. The drying process removes moisture from the meat, making it less susceptible to spoilage. Jerky is a popular type of dried meat that is often made from beef, but can also be made from other types of meat.
  4. Salting: Salting is a method of preserving meat that involves rubbing salt onto the meat and allowing it to dry. The salt helps to inhibit the growth of bacteria and other microorganisms that can cause the meat to spoil.
  5. Fermenting: Fermenting is a method of preserving meat that involves allowing the meat to sit in a brine solution for several days. The brine solution contains salt, water, and other seasonings, as well as lactic acid bacteria, which help to preserve the meat by producing lactic acid, which inhibits the growth of harmful bacteria.
  6. Caning: Canning is a modern method of preserving meat that involves cooking the meat and then sealing it in a jar or can. The heat from the cooking process kills any bacteria in the meat, and the sealed jar prevents new bacteria from getting in, allowing the meat to be stored for long periods without refrigeration.

In conclusion, preserving meat without refrigeration can be challenging, but there are several traditional and modern methods that can be used. By using one or more of these methods, you can enjoy meat that is safe to eat and delicious, even when refrigeration is not available

Making a solar oven


A solar oven is a device that harnesses the power of the sun to cook food. It is an eco-friendly and cost-effective way to prepare food, especially in areas where there is no access to electricity or gas. Making a DIY solar oven is a simple project that can be completed in just a few hours. Here’s how to make a DIY solar oven.

Materials Required:

  • A cardboard box
  • Aluminum foil
  • Black paint or marker
  • Glue
  • Clear plastic sheet
  • Styrofoam sheet
  • Scissors
  • Ruler
  • Pencil

Step 1: Choose the Right Box The first step in making a solar oven is to choose the right box. The box should be large enough to hold a cooking pot or dish. It should also be sturdy enough to withstand the heat of the sun. A pizza box is an excellent choice for a small solar oven, while a larger box such as a shipping box is ideal for a larger oven.

Step 2: Prepare the Box Using a ruler and pencil, draw a square on the top of the box, leaving at least an inch of space on all sides. Cut along the lines with scissors to create a square opening. This will be the lid of the solar oven.

Step 3: Insulate the Box To insulate the box, line the inside with a sheet of Styrofoam. This will help to keep the heat inside the oven. Use glue to attach the Styrofoam to the inside of the box.

Step 4: Line the Box with Foil Using aluminum foil, line the bottom and sides of the box. The shiny side should face inward to reflect the heat. Use glue to attach the foil to the box.

Step 5: Paint or Marker the Inner Lid To absorb heat, paint or color the inside of the lid with black paint or marker. This will help to absorb the heat and transfer it to the food. Allow the paint to dry completely.

Step 6: Add Clear Plastic Sheet Cut a sheet of clear plastic slightly larger than the lid opening. Use glue to attach it to the underside of the lid, so it covers the opening. This will allow sunlight to enter the oven.

Step 7: Test the Oven To test the oven, place a pot of food inside and place the lid on top. Place the oven in direct sunlight, making sure the plastic sheet faces the sun. Check the food after an hour or so, and if it’s not cooked, leave it in for a little longer.

In conclusion, making a DIY solar oven is an easy and cost-effective way to cook food. By following these steps, you can make a solar oven that is perfect for camping, picnics, or even cooking at home. A solar oven can help you save money and reduce your carbon footprint, all while enjoying a delicious meal prepared with the power of the sun.

here are a few tips to keep in mind to ensure you get the best results. Here’s how to use a solar oven.

  1. Choose the Right Day Solar ovens work best on clear, sunny days. Choose a day with plenty of sunshine and minimal cloud cover.
  2. Position the Oven Place the solar oven in a location that gets full sun exposure. Make sure it is positioned so that the reflectors and lid are facing the sun.
  3. Preheat the Oven It’s important to preheat your solar oven before adding food. This helps to ensure that the oven is at the right temperature to cook the food. Preheat the oven for 15-20 minutes before adding food.
  4. Prepare the Food Food should be prepared and placed in a dark, shallow pot or dish. Dark colors absorb more heat and transfer it to the food. Cover the pot with a lid or foil to help retain heat.
  5. Place the Food in the Oven Carefully place the pot or dish in the center of the solar oven. Make sure it is balanced and won’t tip over.
  6. Monitor the Temperature Solar ovens can reach temperatures of up to 350 degrees Fahrenheit. It’s important to monitor the temperature of the oven to ensure that it is cooking the food properly. A cooking thermometer can be used to check the temperature of the food.
  7. Adjust the Oven If the temperature of the oven is too low, adjust the position of the oven to get more direct sunlight. If the temperature is too high, adjust the position of the oven or open the lid slightly to release some of the heat.
  8. Cook the Food Cooking times will vary depending on the type of food and the temperature of the oven. It may take longer to cook food in a solar oven than in a conventional oven, so be patient and allow extra time.
  9. Remove the Food Carefully remove the pot or dish from the oven using oven mitts or pot holders. Be careful not to spill the hot food.

In conclusion, using a solar oven is a simple process that requires a bit of patience and attention to detail. By following these steps, you can enjoy a delicious meal prepared with the power of the sun. Solar ovens are a great way to save money, reduce your carbon footprint, and enjoy the benefits of cooking with renewable energy

My New book is finally published


Get it here!!!

Bags, Bullets, Beans, Band-Aids, Bunkers and Boots, Book – Google Books

Attention all survival enthusiasts! Are you prepared for any situation life may throw your way? Introducing “Bags, Bullets, Beans, Band-Aids, Bunkers and Boots, Book,” the ultimate beginner’s guide to survival prepping.

With this comprehensive guidebook, you’ll learn how to establish a plan and different levels of preparedness to make sure you’re ready for anything. You’ll also discover how to create a Mutual Assistance Group, the importance of Bags and their different types, including the Everyday Carry Bag (EDC), the Get Home Bag (GHB), the Bug Out Bag (BOB), and the I’m Not Coming Home Bag (INCH Bag).

In addition, you’ll find a wealth of knowledge on Bullets and other Weapons, including hand weapons, knives, clubs, pistols, rifles, shotguns, antique weapons, and even artillery. You’ll learn how to create your own Bean stockpile, including tips on growing and preserving your own food, as well as raising and caring for animals like bunnies, chickens, goats, and pigs.

This guide also includes information on basic first aid and how to create a first aid kit, along with a First Aid guide, CPR, and treatment for burns, breaks, bullet wounds, and more. You’ll even learn how to create Bunkers and other Structures for defensive purposes, including fortifications, lighting, sandbags, and more.

Last but not least, this book provides a comprehensive list of clothing and gear, including cold and warm weather gear, car emergency gear, and overlanding gear.

Don’t be caught off guard during an emergency or crisis. Be ready with “Bags, Bullets, Beans, Band-Aids, Bunkers and Boots, Book,” the ultimate guide to survival prepping. Get your copy today and start preparing for whatever the future holds.