Tag Archives: shtf

My New book is finally published


Get it here!!!

Bags, Bullets, Beans, Band-Aids, Bunkers and Boots, Book – Google Books

Attention all survival enthusiasts! Are you prepared for any situation life may throw your way? Introducing “Bags, Bullets, Beans, Band-Aids, Bunkers and Boots, Book,” the ultimate beginner’s guide to survival prepping.

With this comprehensive guidebook, you’ll learn how to establish a plan and different levels of preparedness to make sure you’re ready for anything. You’ll also discover how to create a Mutual Assistance Group, the importance of Bags and their different types, including the Everyday Carry Bag (EDC), the Get Home Bag (GHB), the Bug Out Bag (BOB), and the I’m Not Coming Home Bag (INCH Bag).

In addition, you’ll find a wealth of knowledge on Bullets and other Weapons, including hand weapons, knives, clubs, pistols, rifles, shotguns, antique weapons, and even artillery. You’ll learn how to create your own Bean stockpile, including tips on growing and preserving your own food, as well as raising and caring for animals like bunnies, chickens, goats, and pigs.

This guide also includes information on basic first aid and how to create a first aid kit, along with a First Aid guide, CPR, and treatment for burns, breaks, bullet wounds, and more. You’ll even learn how to create Bunkers and other Structures for defensive purposes, including fortifications, lighting, sandbags, and more.

Last but not least, this book provides a comprehensive list of clothing and gear, including cold and warm weather gear, car emergency gear, and overlanding gear.

Don’t be caught off guard during an emergency or crisis. Be ready with “Bags, Bullets, Beans, Band-Aids, Bunkers and Boots, Book,” the ultimate guide to survival prepping. Get your copy today and start preparing for whatever the future holds.

Building a Community: The Benefits of Joining a Prepper Group


The idea of preparing for emergencies and disasters has become increasingly popular in recent years. Many people recognize the importance of being ready for unexpected situations that could leave them without access to food, water, shelter, or other essential resources. One of the most effective ways to prepare for such events is by joining a prepper group.

A prepper group is a community of like-minded individuals who share a common goal of being prepared for emergencies and disasters. Members of these groups come from all walks of life and have a variety of skills and knowledge that they bring to the table. By joining a prepper group, you can gain access to a wealth of information, resources, and support that can help you prepare for and survive emergencies and disasters.

In this article, we will discuss the benefits of joining a prepper group and provide some tips for building a strong and effective prepper community.

  1. Access to Knowledge and Expertise

One of the biggest benefits of joining a prepper group is the access to knowledge and expertise. Prepper groups often have members with a wide range of skills and experience, including survival skills, first aid, gardening, food preservation, and more. By tapping into the collective knowledge of your prepper group, you can learn new skills and gain valuable insights that can help you become better prepared for emergencies and disasters.

  1. Sharing of Resources

Another benefit of joining a prepper group is the sharing of resources. Prepper groups often pool their resources and knowledge to help each other prepare for emergencies and disasters. This can include sharing information about the best places to buy supplies, trading or bartering goods and services, and even pooling funds to purchase supplies in bulk. By working together, prepper groups can stretch their resources further and ensure that everyone has access to the supplies they need to survive.

  1. Support and Community

Joining a prepper group can also provide you with a sense of community and support. Prepper groups are made up of people who share a common goal and are committed to helping each other prepare for emergencies and disasters. This sense of community can be invaluable during times of crisis, providing you with a support network that you can turn to for help, advice, and encouragement.

  1. Improved Safety and Security

By joining a prepper group, you can also improve your safety and security. Prepper groups often work together to create plans and strategies for dealing with emergencies and disasters, which can help to minimize the risks and increase the chances of survival. Additionally, prepper groups may also collaborate on security measures, such as setting up a neighborhood watch program or sharing tips on how to secure your home and property.

Tips for Building a Strong Prepper Community

If you are interested in building a prepper community, here are some tips to help you get started:

  1. Find Like-Minded People

The first step in building a prepper community is to find like-minded people who share your goals and interests. Look for local prepper groups in your area or consider starting your own group by reaching out to friends and family members who are interested in preparing for emergencies and disasters.

  1. Establish Clear Goals and Objectives

Once you have a group of interested individuals, it is important to establish clear goals and objectives for your prepper community. This could include developing a list of emergency supplies, creating a communication plan, or identifying key skills and expertise that the group wants to develop.

  1. Communicate and Collaborate

Communication and collaboration are essential for building a strong prepper community. Make sure that everyone is on the same page regarding the group’s goals and objectives, and establish clear lines of communication for sharing information and resources.

  1. Regularly Meet and Train

Regular meetings and training sessions can help to keep your prepper community engaged and motivated. Schedule regular meetings to discuss progress, share regular meetings to discuss progress, share information, and plan for upcoming activities. Consider offering training sessions to develop specific skills and expertise, such as first aid, food preservation, or self-defense.

  1. Build a Network of Resources

Building a network of resources can help your prepper community to better prepare for emergencies and disasters. Consider reaching out to local businesses, community organizations, and government agencies to establish connections and resources that could be beneficial in a crisis.

  1. Be Prepared for Different Scenarios

Prepping is not a one-size-fits-all approach, and different emergencies and disasters require different strategies and preparations. Make sure that your prepper community is prepared for a variety of scenarios, including natural disasters, economic collapse, and civil unrest.

  1. Practice Operational Security

Operational security (OPSEC) is critical for maintaining the safety and security of your prepper community. This means being discreet and cautious about sharing sensitive information and avoiding attracting unnecessary attention.

In conclusion, building a strong prepper community requires finding like-minded individuals, establishing clear goals and objectives, communicating and collaborating, regularly meeting and training, building a network of resources, preparing for different scenarios, and practicing operational security. By following these tips, you can help to create a strong and resilient prepper community that is better prepared for emergencies and disasters.

How to dig a DIY water well


Digging a water well is a great way to secure a water supply on your property. With the help of some simple tools and the right knowledge, you can easily create a DIY water well that will provide you with clean, fresh water for years to come. Here’s how to do it.

Step 1: Choose the Location

The first step in digging a DIY water well is to choose the right location. You need to find a spot that is near a natural water source, such as a stream or a spring. This will make it easier to dig and will increase the chances of finding water.

You also need to make sure that the spot is not too close to any septic systems or other sources of contamination. You can use a soil test kit to check for any signs of contamination.

Step 2: Gather the Tools

The next step is to gather the tools you will need to dig the well. You will need a pickaxe, a shovel, a bucket, a well screen, a well cap, a well pump, and some PVC piping.

You can purchase all of these items at your local hardware store or online. You can also rent a drilling rig if you prefer, but it can be expensive.

Step 3: Start Digging

Now it’s time to start digging. You will need to dig a hole that is about 10 to 15 feet deep and 2 feet wide. Make sure that the sides of the hole are straight and not sloped.

Use the pickaxe to break up any rocks or hard soil that you encounter. Use the shovel to remove the dirt and debris from the hole.

Step 4: Install the Well Screen

Once you have dug the hole, it’s time to install the well screen. The well screen is a cylinder-shaped piece of metal or PVC that has small holes in it. It helps to filter out any debris or sediment that could clog the well pump.

Insert the well screen into the hole and make sure that it is secure. You can use rocks or cement to hold it in place.

Step 5: Install the PVC Piping

Next, you need to install the PVC piping. This will be used to bring the water up from the well to the surface.

Attach the PVC piping to the well screen and lower it down into the well. Make sure that it is securely attached and that it extends above the surface of the ground.

Step 6: Install the Well Cap

Once the PVC piping is in place, it’s time to install the well cap. The well cap is a cover that protects the well from debris and animals.

Attach the well cap to the top of the PVC piping and make sure that it is securely fastened.

Step 7: Install the Well Pump

The final step is to install the well pump. The well pump is what will be used to bring the water up from the well and into your home.

Attach the well pump to the top of the PVC piping and make sure that it is securely fastened. Connect the well pump to your home’s water system and turn it on to test it.

Conclusion

Digging a DIY water well can be a challenging but rewarding experience. With the right tools and knowledge, you can create a reliable water source that will provide you with clean, fresh water for years to come. Just remember to take your time and follow these steps carefully to ensure that your well is installed correctly and safely.

Tips for starting a prepper garden


A prepper garden is an excellent way to provide a source of food during an emergency or crisis. Growing your own food not only saves money but also ensures that you have fresh produce available at all times. While most people tend to focus on growing fruits and vegetables, it’s also essential to consider growing other crops like potatoes, sorghum, corn, wheat, and other alternatives. In this article, we’ll discuss some tips for starting a prepper garden and what crops to consider planting.

1.Soil Preparation

Before planting anything in your garden, you need to prepare the soil. This involves removing any weeds or debris and tilling the soil to a depth of at least six inches. You can also add organic matter like compost or manure to the soil to improve its quality. If you’re planting potatoes, ensure the soil is loose and well-drained.

2.Choosing the Right Crops

When it comes to prepper gardening, it’s essential to choose the right crops that can thrive in your climate and provide maximum nutrition. Potatoes, for example, are a versatile crop that can be grown in most regions and provide a good source of carbohydrates. Sorghum is also a good option for prepper gardens, as it’s drought-tolerant and can be used to make flour, syrup, or even animal feed.

Corn is another popular crop for prepper gardens, as it’s rich in carbohydrates, protein, and fiber. It’s also easy to grow and can be used for a variety of purposes like making flour, cornmeal, and animal feed. Wheat is another staple crop that’s easy to grow and provides a good source of protein, fiber, and carbohydrates. It’s also versatile and can be used to make flour or bread.

Other crops to consider planting in your prepper garden include beans, peas, tomatoes, cucumbers, squash, and peppers. These vegetables are easy to grow and provide a good source of vitamins, minerals, and fiber.

3.Starting Seeds

Starting seeds is an excellent way to ensure that you have a steady supply of fresh produce throughout the growing season. You can start seeds indoors in late winter or early spring and transplant them into your garden once the weather warms up. Be sure to follow the instructions on the seed packet for proper planting depth and spacing.

4.Proper Watering

Proper watering is essential for the health and growth of your plants. You should water your plants deeply once or twice a week, depending on the weather and soil conditions. Be sure to water early in the day to reduce the risk of fungal diseases. If you’re growing potatoes, they require consistent moisture to ensure proper tuber development.

5.Pest Control

Pests like aphids, caterpillars, and beetles can quickly destroy your prepper garden if left unchecked. One way to control pests is to plant companion crops like marigolds or garlic, which repel pests naturally. You can also use organic pest control methods like neem oil or insecticidal soap.

6.Harvesting

When it comes to harvesting your prepper garden, timing is everything. You should harvest your crops when they’re ripe and ready to eat. Potatoes should be harvested once the foliage dies back, while sorghum can be harvested once the seed heads turn brown. Corn should be harvested once the ears are plump and the silks have turned brown.

It’s important to harvest your crops in a timely manner, as leaving them in the ground or on the plant for too long can cause them to become overripe, and their quality may deteriorate. Additionally, leaving crops in the ground for too long can make them more susceptible to pests and diseases.

When harvesting your crops, make sure you have the necessary tools and containers on hand. Some crops, like tomatoes and peppers, are delicate and should be picked by hand. Others, like potatoes and carrots, can be dug up with a garden fork.

7. Storage

Once you’ve harvested your crops, it’s important to store them properly. Some crops, like potatoes, should be stored in a cool, dark place to prevent them from sprouting. Others, like onions and garlic, should be stored in a dry, well-ventilated area.

Finally, don’t forget to save some of your harvest for seed. Select the healthiest and best-performing plants to save seed from, and make sure to properly dry and store the seeds for use in next year’s garden.

The best ways to store and preserve grains for future use


Grains have been a staple food for humans for thousands of years, providing a reliable source of carbohydrates, protein, and other essential nutrients. Storing and preserving grains for future use is an important part of prepping, as it allows you to have a long-term supply of food in case of emergencies. In this article, we will discuss the best ways to store and preserve grains, including sorghum, corn, wheat, and other alternatives.

  1. Dry Storage

One of the most common and simple ways to store grains is in dry storage. This method involves storing grains in a cool, dry place with good ventilation. The ideal temperature for dry storage is between 50 and 70 degrees Fahrenheit, with humidity levels below 15 percent. Grains should be stored in airtight containers, such as glass jars or food-grade plastic buckets with tight-fitting lids.

  1. Vacuum Sealing

Vacuum sealing is another effective method of grain storage, which involves removing all the air from the storage container to prevent spoilage. This method is particularly useful for long-term storage of grains, as it can extend the shelf life of grains for several years. Vacuum-sealed containers can be stored in a cool, dry place, such as a basement or pantry.

  1. Freezing

Freezing is an effective method of preserving grains, particularly those that are prone to insect infestations, such as corn and wheat. Grains can be frozen in airtight containers or vacuum-sealed bags, and stored in the freezer for up to two years. To prevent moisture from forming on the grains during thawing, it is important to allow the grains to come to room temperature before opening the container.

  1. Dehydrating

Dehydrating is another effective method of preserving grains, which involves removing the moisture from the grains to prevent spoilage. This method is particularly useful for sorghum, which can be difficult to store due to its high moisture content. To dehydrate grains, spread them out in a single layer on a dehydrator tray, and dry them at a low temperature for several hours. Once dry, the grains can be stored in airtight containers.

  1. Mylar Bags

Mylar bags are a popular storage option for grains, as they are airtight and moisture-resistant. These bags can be purchased in various sizes, and can be used to store grains for long periods of time. To use Mylar bags, place the grains inside the bag, and seal the bag using a heat sealer. The bags can be stored in a cool, dry place, such as a basement or pantry.

  1. Oxygen Absorbers

Oxygen absorbers are small packets that are used to remove the oxygen from the storage container, which can help to prevent spoilage and extend the shelf life of grains. These packets can be placed inside airtight containers or Mylar bags, and can be purchased online or at specialty food stores.

  1. Silos

Silos are large storage containers that are used to store grains in bulk. These containers are often used by farmers and ranchers to store grains for animal feed, but can also be used for long-term storage of grains for human consumption. Silos should be stored in a cool, dry place, and should be inspected regularly for signs of moisture or insect infestation.

In conclusion, there are several effective methods for storing and preserving grains for future use, including dry storage, vacuum sealing, freezing, dehydrating, Mylar bags, oxygen absorbers, and silos. When storing grains, it is important to keep them in a cool, dry place, with good ventilation and low humidity levels. By following these tips, you can ensure that you have a reliable source of food for yourself and your family in case of emergencies.

When it comes to choosing which grains to store, it is important to consider their nutritional value and how versatile they are in cooking. Some of the most popular grains for long-term storage include sorghum, corn, wheat, rice, and barley. Sorghum is a great alternative to wheat for those with gluten intolerance, and it is also high in protein, fiber, and antioxidants. Corn is another versatile grain that can be used for making bread, tortillas, and other baked goods, and it is also a good source of carbohydrates and fiber.

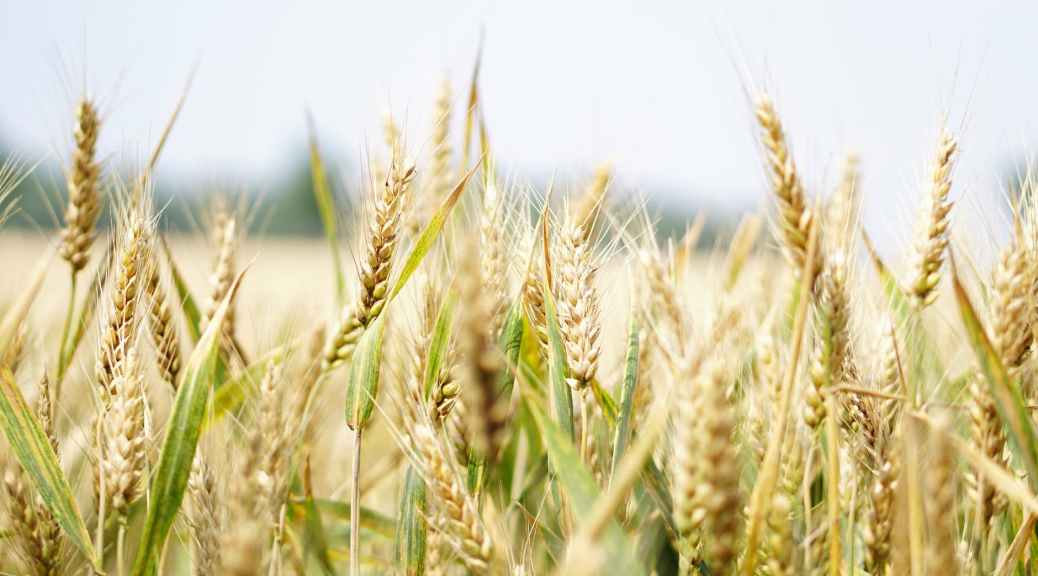
Wheat is perhaps the most commonly stored grain, and for good reason. It is a great source of carbohydrates, protein, and fiber, and can be used for making a wide variety of foods, including bread, pasta, and cereal. When storing wheat, it is important to choose the right type of wheat, as some varieties are better suited for long-term storage than others. Hard red wheat, for example, is one of the most popular varieties for long-term storage, as it has a high protein content and is less prone to spoilage than other types of wheat.

In addition to these grains, there are several other alternatives that are worth considering for long-term storage. These include oats, quinoa, millet, and amaranth, all of which are high in nutrients and can be used in a variety of recipes. Oats, for example, are a great source of fiber and protein, and can be used for making oatmeal, granola, and baked goods. Quinoa is another highly nutritious grain, which is high in protein, fiber, and minerals such as iron and magnesium.

In summary, storing and preserving grains is an important part of prepping for emergencies. There are several effective methods for storing grains, including dry storage, vacuum sealing, freezing, dehydrating, Mylar bags, oxygen absorbers, and silos. When choosing which grains to store, it is important to consider their nutritional value and versatility in cooking. By following these tips, you can ensure that you have a reliable source of food for yourself and your family in case of emergencies.

a few notes on SHTF firearms


Hi all

Ive been reading the forums lately and have seen some posts on SHTF firearms that really make me smile.

One guy has 3 weapons and ammo along with a Kevlar vest… but only 3 days food, in his bug out bag.

this really doesn’t make sense to me

for bug out you are probably going to need to have as much food as possible, and if you are moving you wont get time to hunt,  so what would you do with all that ammo and that many guns?

the person in question said they have a shotgun , a pistol and a .22 rifle in semi auto.

without knowing the persons plans i am not able to say too much, but thats seams a little over kill for any situation  to the point that carrying all three will make you inefficient at combat or hunting in any case.

my 2 cents worth is simple — loose the long guns – if you are moving through urban areas .

take the shot gun if you are going short term in the wilderness.

and the .22 if you are going to stay long in the wilderness.

if you have ever served in the military you should know that carrying more then one weapon is going to be a pain , during my service I realized that the lighter the better, now I only carry a pistol, and would prefer a pistol caliber carbine over anything.

Pistols are not great weapons, but the reason I advocate this is simple, they are lighter, and you really need MUCH more food then you think and WATER is extremely heavy.

Officers use submachine guns rather then a rifle, most of the time, simply because it is lighter and has more compact ammo with good accuracy. leaving space for food and water, when resupply is uncertain.

rather have 15 days food and water and a pistol that you will probably not need then dehydrate.

bottom line is you cant eat shotgun shells.